This guide is for an older version of Kantega SSO Enterprise and is no longer maintained.
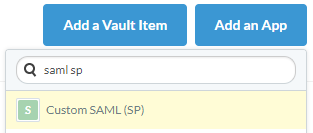
Open the Bitium admin console. Navigate to Apps, then select Add an App. Search for and select saml sp:
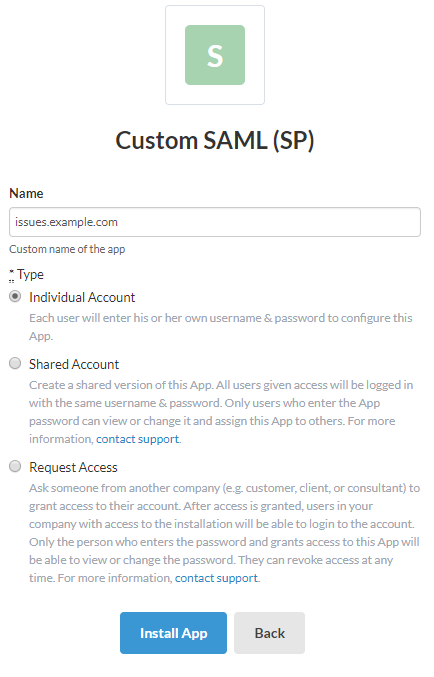
Give your application a name.
Select your preferred Type. E.g. Individual Account.
Press Install App.
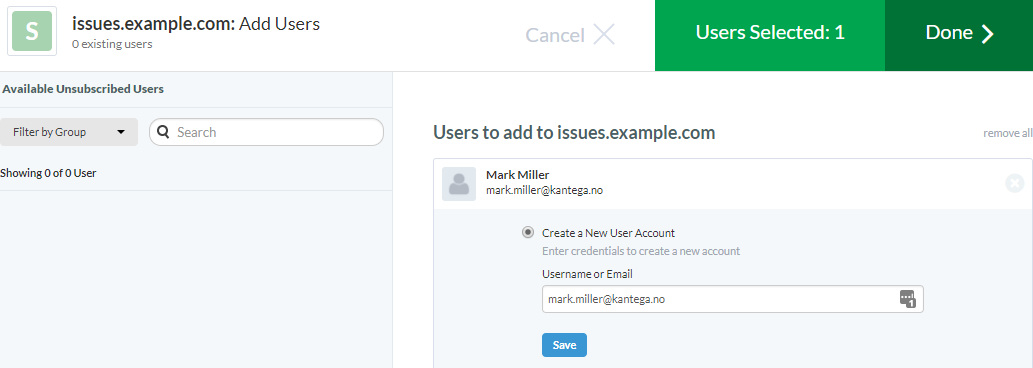
Assign users (subscribers) that will be able to use the app:
Select Assign Users.
Select the preferred accounts.
Choose a username for the selected accounts.
Press Done.
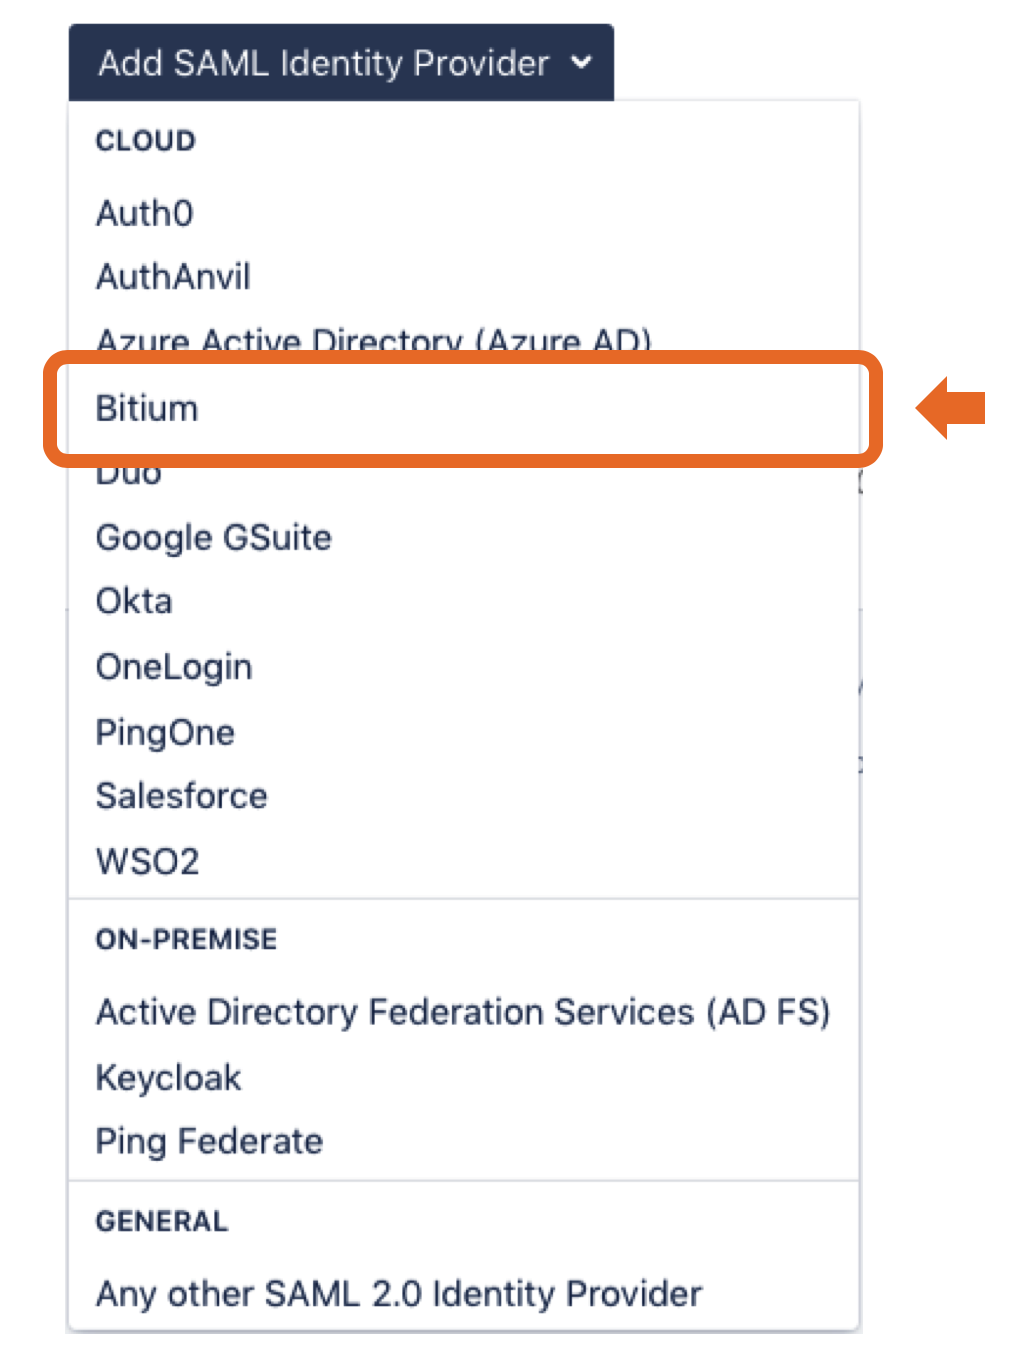
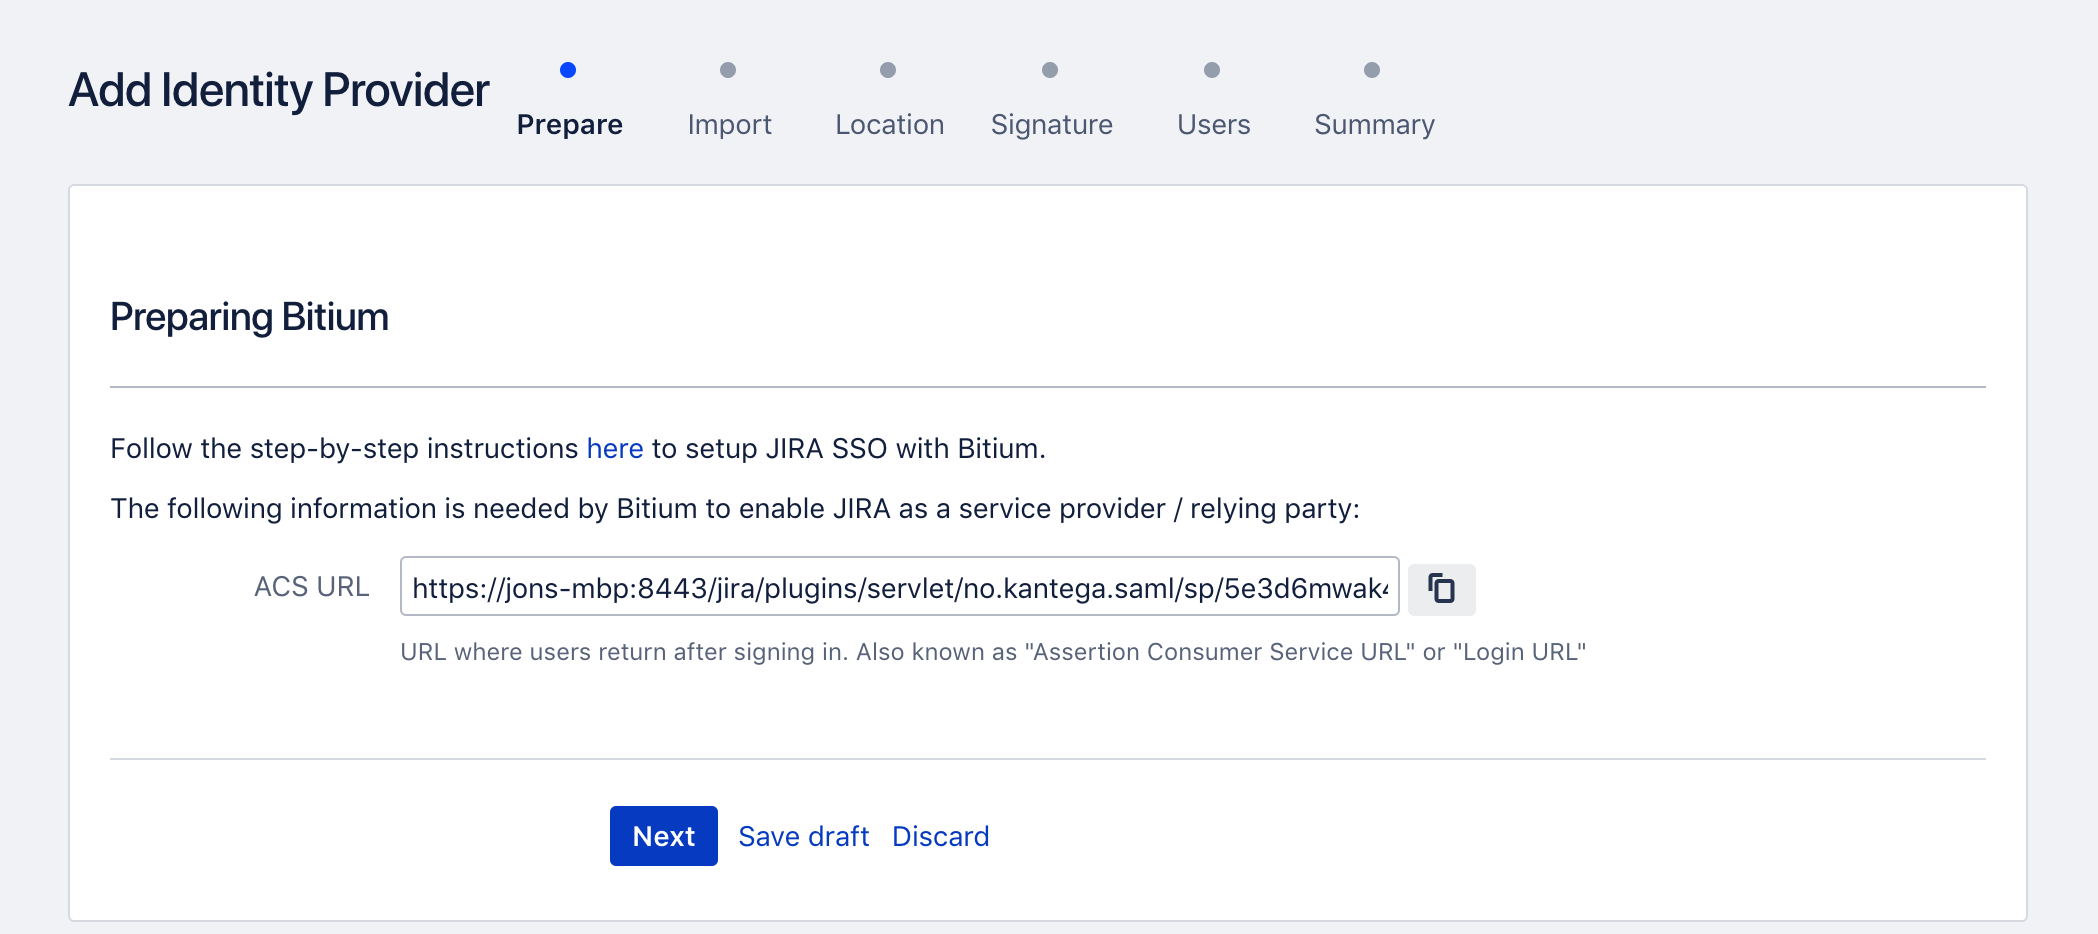
Go to Kantega SSO in a separate browser tab. Add a new identity provider and select “Bitium” from the drop down:
In the Prepare step, Copy the ACS URL.
Go back to the Bitium admin console browser tab. In Apps Overview, select the App you just created.
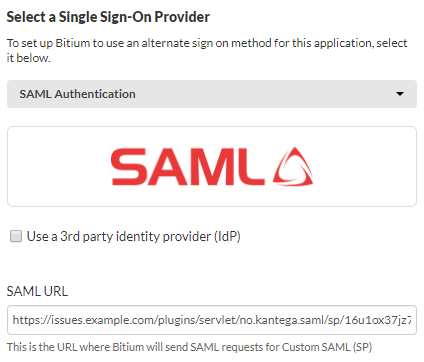
Select Single Sign-on.
Paste the ACS URl from Kantega SSO step into SAML URL field.
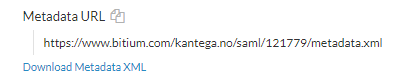
Next, obtain the Bitium identity provider metadata file:
If your Atlassian server has Internet access, copy the metadata URL (preferred)
If your Atlassian server does not have Internet access, download metadata as a file.
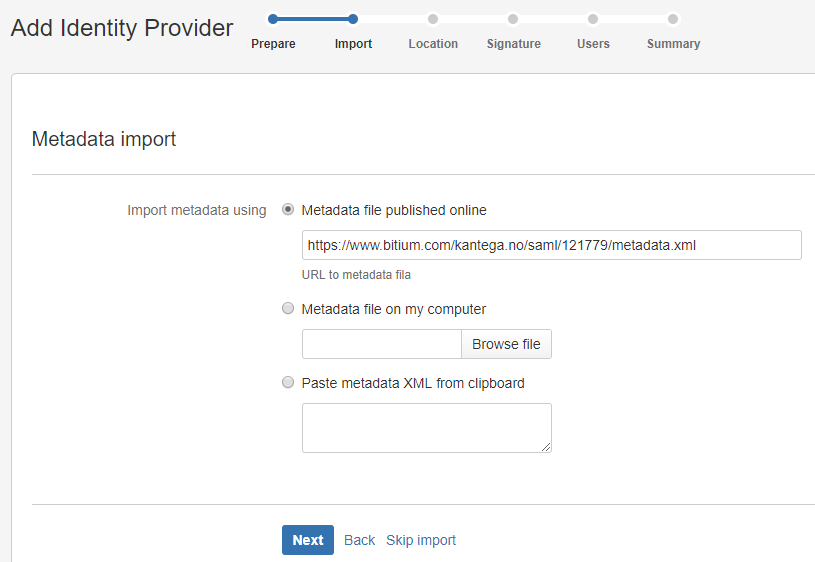
Go back to the KSSO setup wizard and import the metadata from Bitium in the metadata import step:
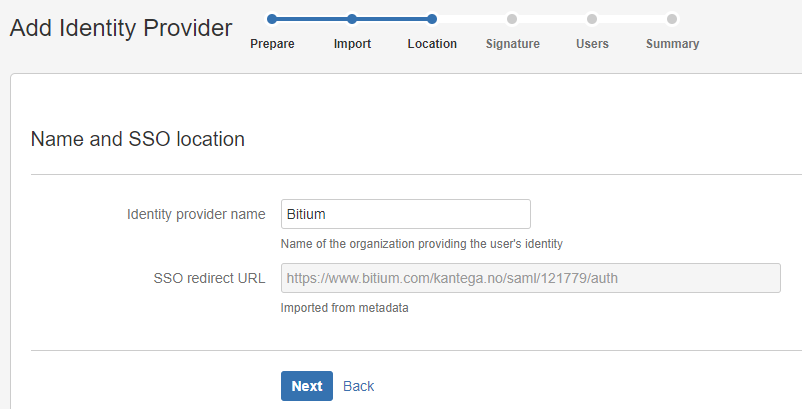
On the location step, give the Identity Provider a name (this name will be visible to end users when logging in). Press Next.
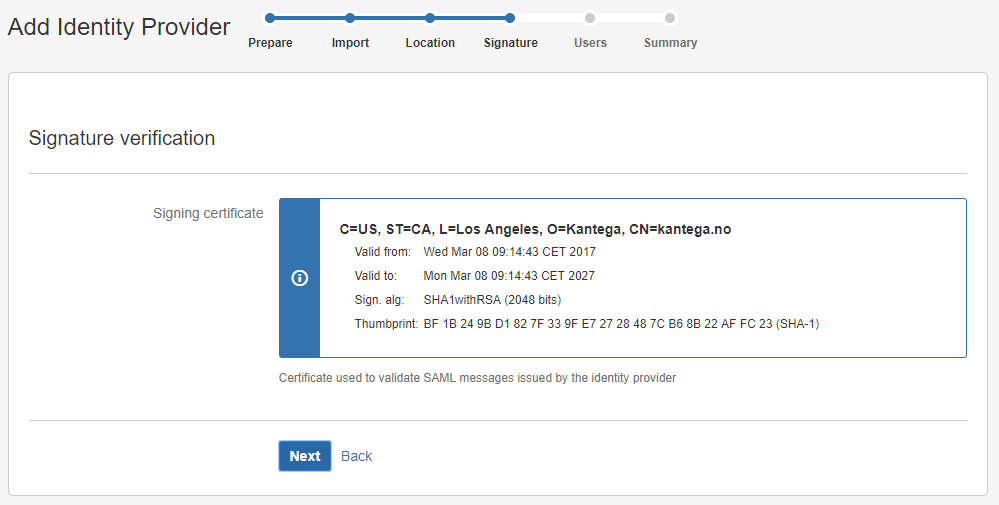
Review the imported signing certificate. (This step is purely informational.)
Select whether users already exist or if you wish to have users automatically created upon login.
Note that for users to be created, a name, username and an email must be sent in the SAML response.
Optionally assign a default group for new users.

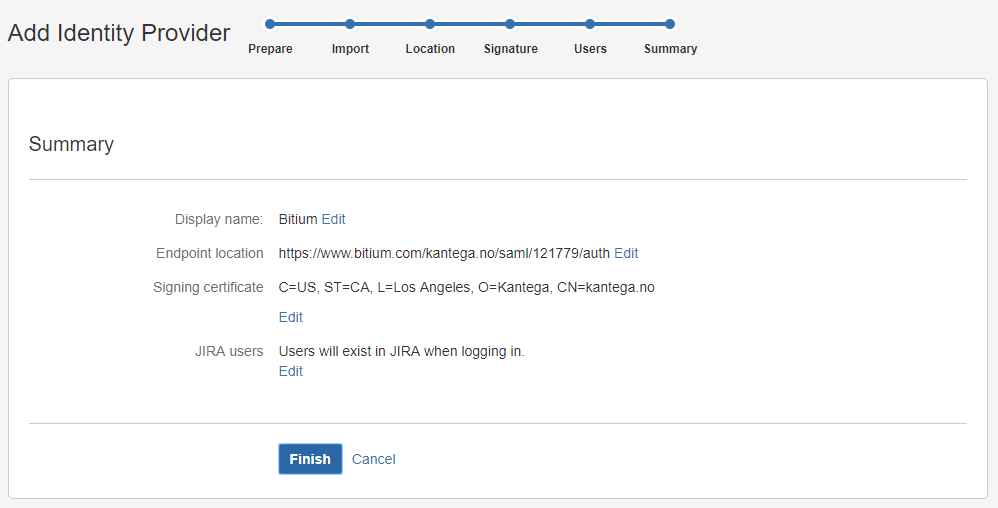
Review the Summary.
Press Finish.
You may now test Bitium login.