This is an upcoming feature in Kantega SSO to support running the Atlassian products Confluence, Jira, Bamboo, and Bitbucket as apps in Microsoft Teams. Kantega SSO also gives you single sign-on using your user’s identity from Azure AD.
If you are planning on running Microsoft Teams in browsers and not only as a standalone app, you will have to consider getting samesite cookies to work for the Atlassian apps when loaded in the Teams app, because of issues with Iframes and samesite cookies.. This problem is expained here: https://jira.atlassian.com/browse/CONFSERVER-59298
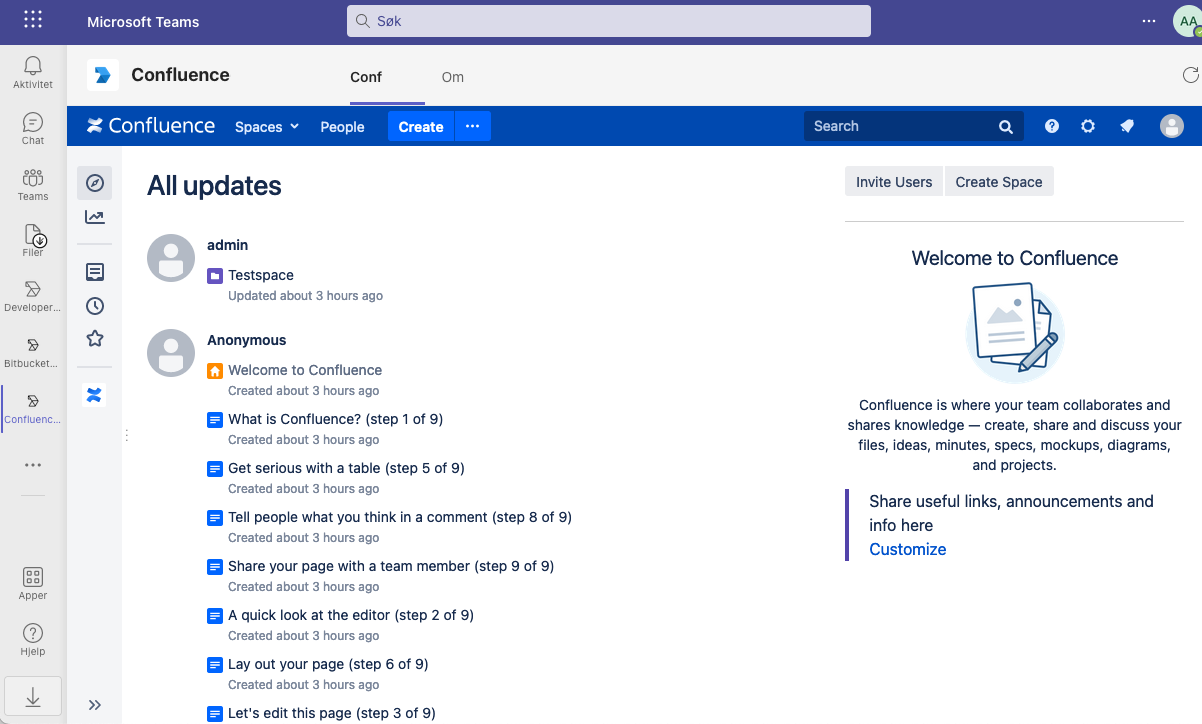
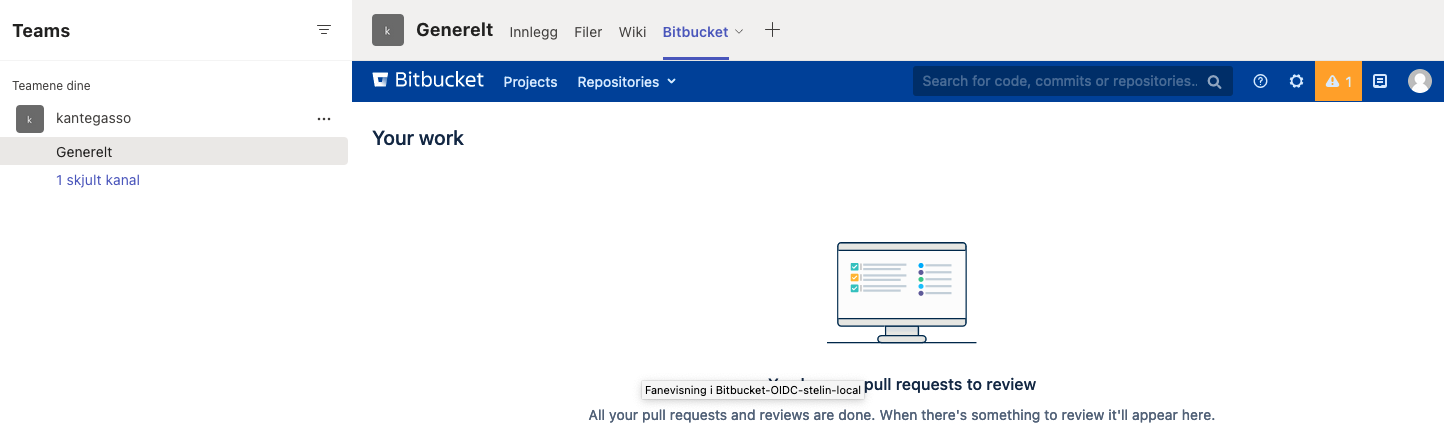
How Confluence may look as an integrated app inside Microsoft Teams after SSO
Overview
To set up what is needed to make Confluence, Jira, bamboo, or Bitbucket run inside Teams and offer SSO a few steps are neccesary. These are:
I. For Confluence only: Disable anti clickjacking protection as this is to strict to allow Confluence being added in a Teams app and enable similar protection in Kantega SSO that allows for usage in Teams.
II. In Azure AD either add relevant Teams SSO configuration to existing OIDC client application that youp set up when configuring Kantega SSO. You may also create a new Teams SSO client application setup. The latter is espesially relevant if your current client application setup is using SAML.
III. Create a Teams app with the relevant URLs and values to allow SSO for your Atlassian product and publish this in your company’s Teams tenant.
IV. Turn on Teams SSO login in Kantega SSO and test your setup.
Parts of this guide is based on this guide from MIcrosoft https://docs.microsoft.com/en-us/microsoftteams/platform/sbs-tabs-and-messaging-extensions-with-sso?tabs=vs2019 .
Setup in detail
Below the above 4 steps will be described in details for Jira.
I. For Confluence only: Disable anti clickjacking protection and enable protection in Kantega SSO
Follow this guide to disable the built-in anti clickjacking protection in Confluence: https://confluence.atlassian.com/confkb/confluence-page-does-not-display-in-an-iframe-827335781.html
2. Turn on Content Security Policy switch to give similar protection, but allowing for Confluence to be loaded in Microsoft Teams.
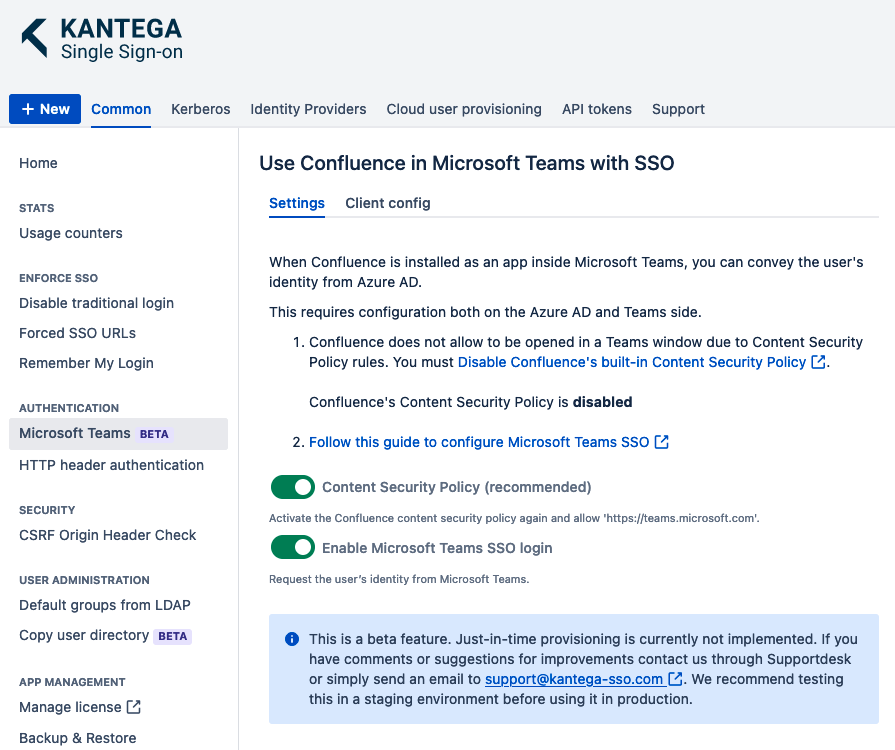
The Content Security Policy switch is only available for Confluence. For other products this is included in the Enable Microsoft Teams SSO login switch.
II. In Azure AD set up Teams SSO configuration
Log into https://portal.azure.com with an administrator account. Search in top bar for
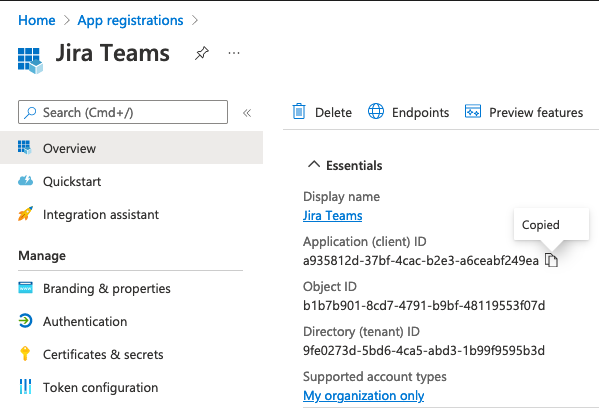
App registrationsand navigate to this page. During these next steps you shold create and copy the valuesClient ID,Client SecretandAPI urlto use in later sections.
2.
If you have an existing Azure AD OIDC client application set up in Kantega SSO you may use this. See where to find Client IDs in the below screenshot:
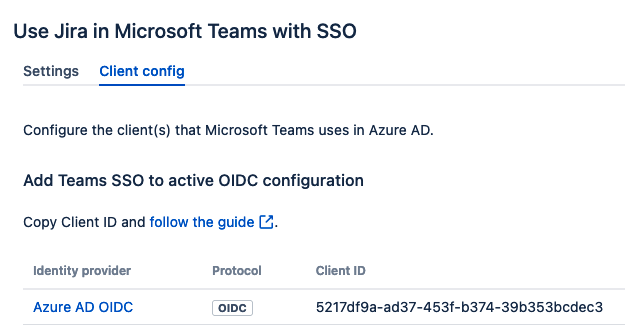
You may search for the Client ID in the search bar of Azure AD. Open your existing client appliction and skip to point 6.
If you do not have an existing OIDC client application continue to step 3.
3. Press New registration, set a name for your new client application and press Register. You do not have to fill any of the other fields on this page.
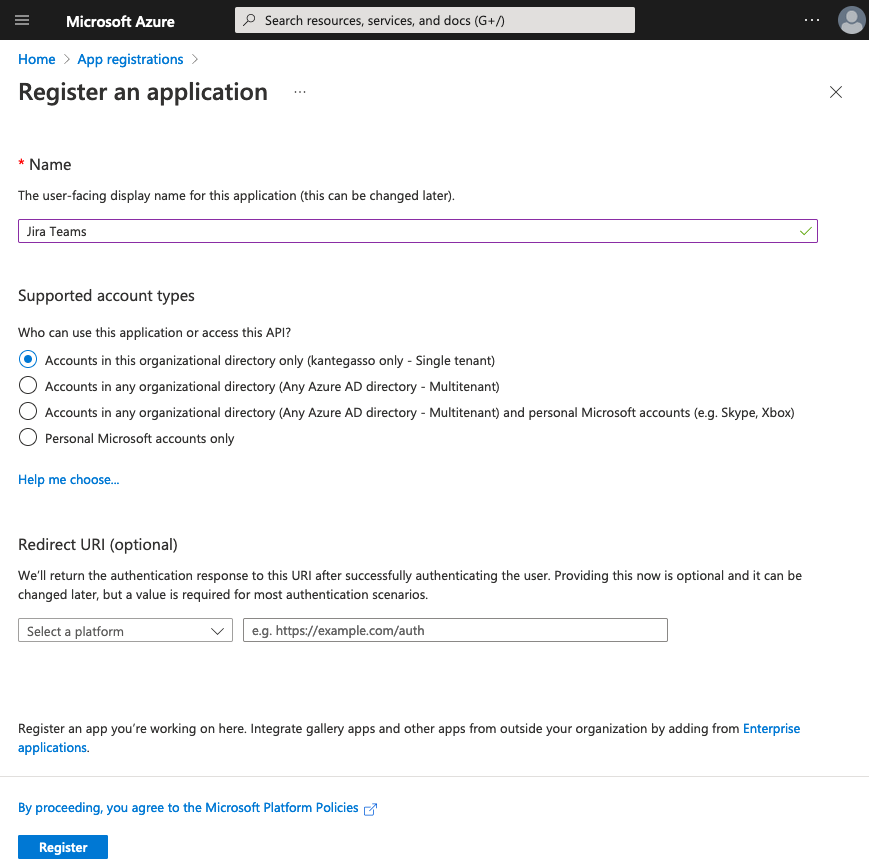
4. Copy Client ID to use in later steps.
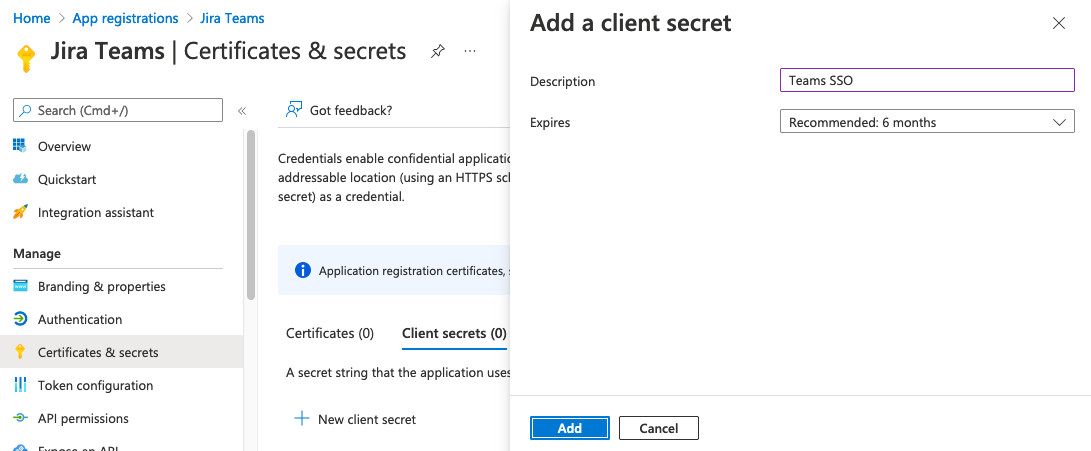
5. Click left menu to
Certificates & secrets and click New client secret. Type a suitable description, set appropriate expiry, and click Add. Copy the Secret Value of the new secret for later steps, and not the Secret ID.
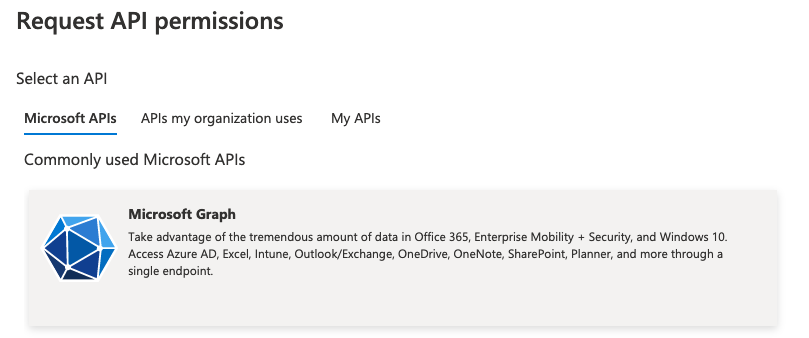
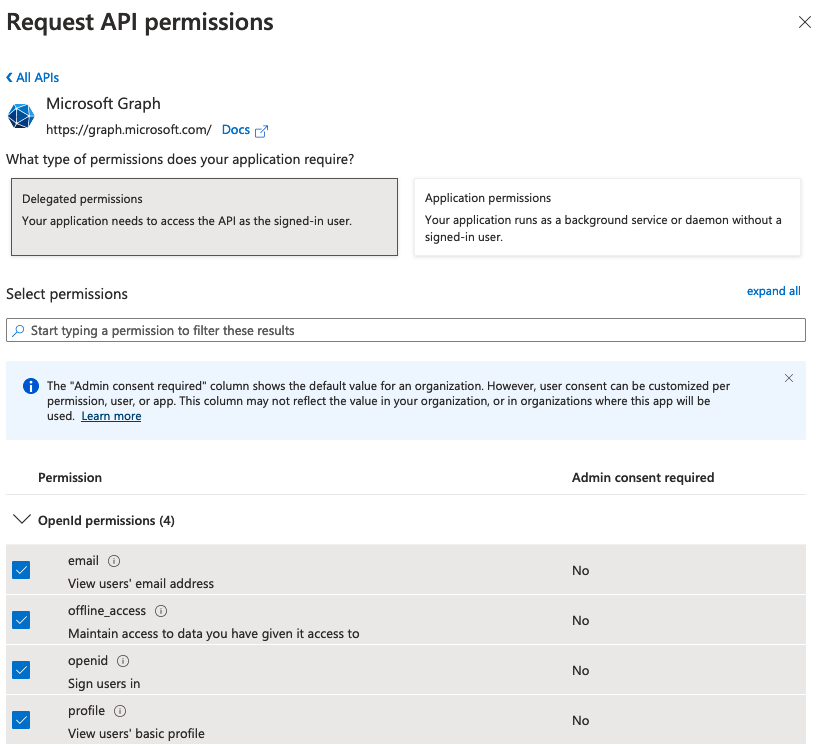
6. Click into API permissions and Add permissions.
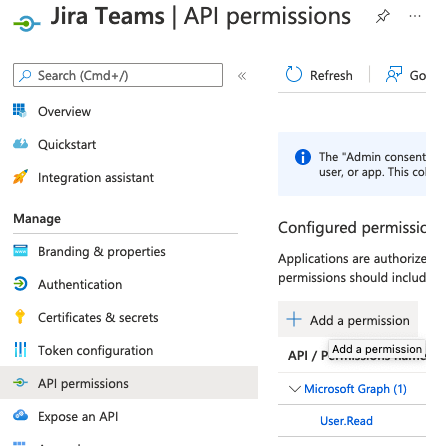
7. Click Microsoft Graph image and Delegated permissions. Select all four OpenId permissions: emailoffline_access openidprofile. User.Read should already be selected from before. Press Add Permissions button.
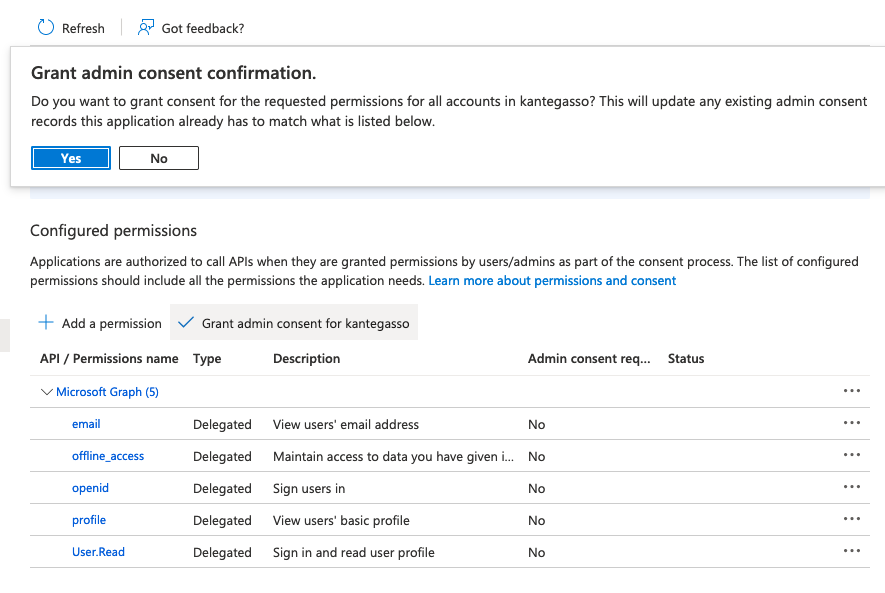
8. Press Grant admin consent for <your tenant name> button and press Yes. This is neccesary to allow users to log in via the new Teams SSO app into the Atlassian application.
9. Click Expose and API in left menu. Click Application ID URI Set button on top. The App ID URI should be set to this address:
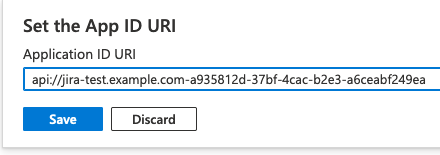
api://<your-atlassian-server-name-without-portnumber>-<Client ID value-from-step-4>
Please note the “-” between the two values above. Copy the api address for later use and press Save.
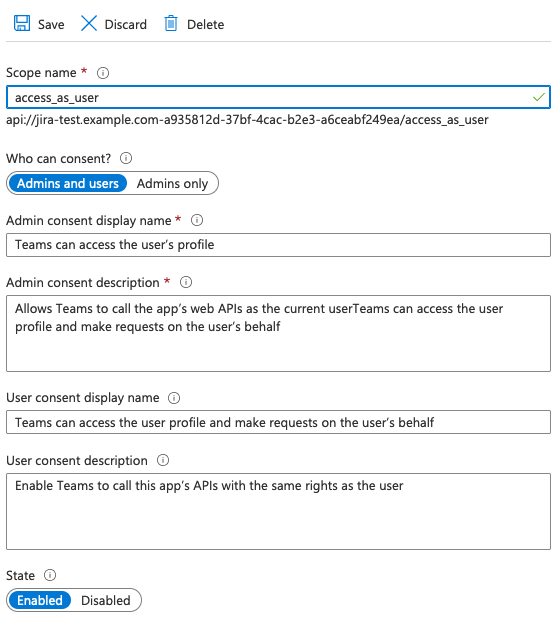
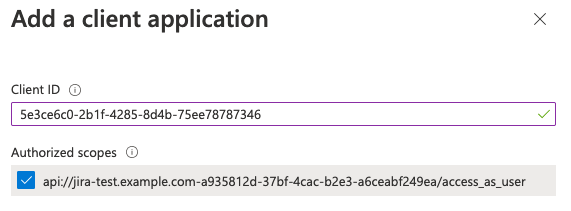
10. Press Add a scope and insert the following scope values in the panel that appears:
, enter
access_as_useras the Scope name.Set Who can consent? to
Admins and users.To configure the admin and user consent prompts with appropriate values for
access_as_userscope, provide the following information in the fields:Enter
Teams can access the user’s profileas Admin consent display name.Enter
Allows Teams to call the app’s web APIs as the current useras Admin consent description.Enter
Teams can access the user profile and make requests on the user’s behalfas User consent display name.Enter
Enable Teams to call this app’s APIs with the same rights as the useras User consent description.Ensure that State is set to Enabled.
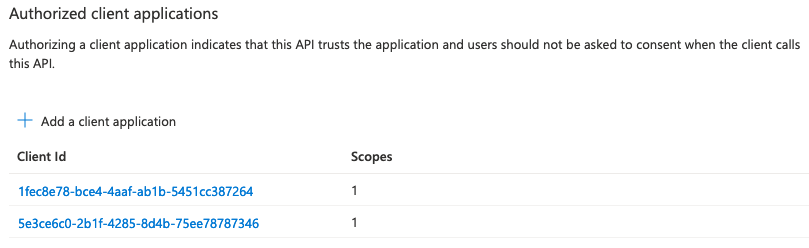
11. Add Microsoft Teams client application IDs by pressing Add a client application and using the below values:1fec8e78-bce4-4aaf-ab1b-5451cc387264 (Teams mobile or desktop application)
5e3ce6c0-2b1f-4285-8d4b-75ee78787346 (Teams web application)
Make sure to select Authorized scopes before you press Add application for the two values:

Afterwards this section should look like this:
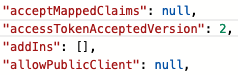
12. Then go to the Manifest left menu page, set value "accessTokenAcceptedVersion": 2, and press Save.
III. Create Teams App and deploy for use in your company’s Teams tenant
Inside Microsoft Teams with an admin user or ordinary user press the
...in the left menu, and findDeveloper Portal.
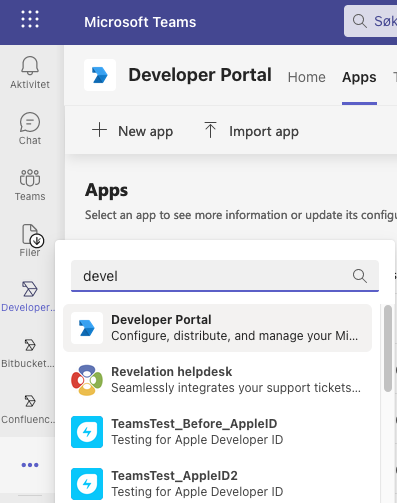
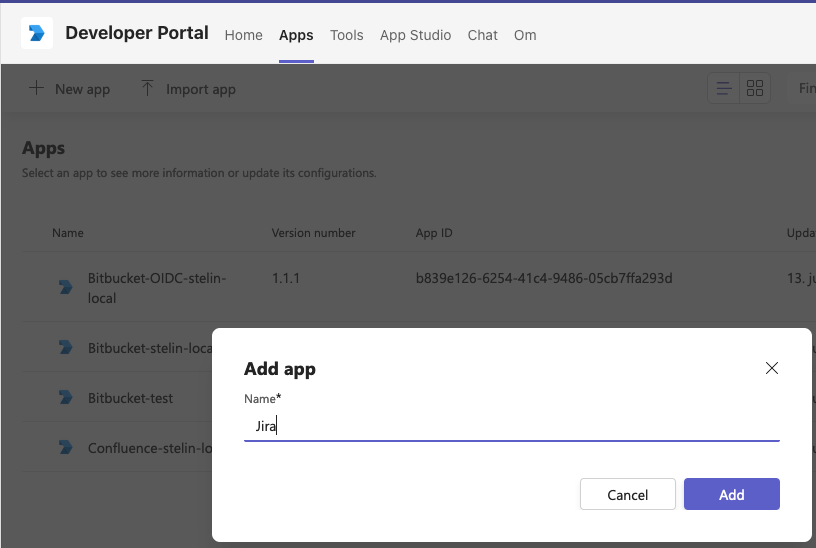
2. Go to Apps in Developer Portal and press either Create your first app or New app button, give a name your app and press Add.
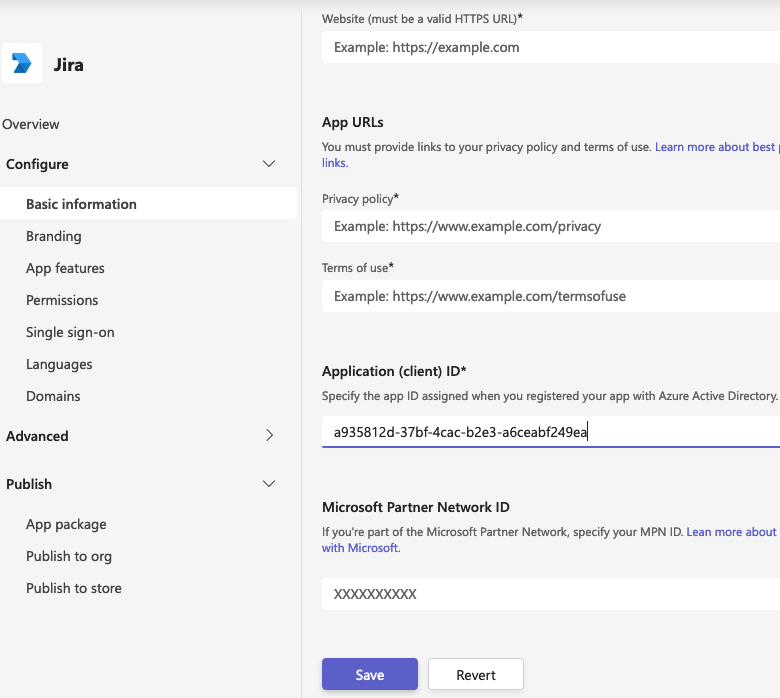
3. On the Basic information page you may give suitable values for your App. All the below values must be set to allow the appliation to be published later:
Developer or company name
Website
Privacy policy
Terms of use
In the Application (client) ID insert the Client ID value from the Azure AD section above in this guide. Press Save.
4.
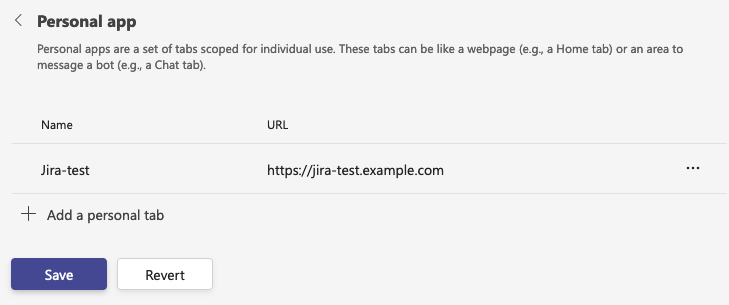
In the left menu click App features and select
Personal app.
ClickCreate your first personal apptab if you want the app to be available in the left menu in Teams.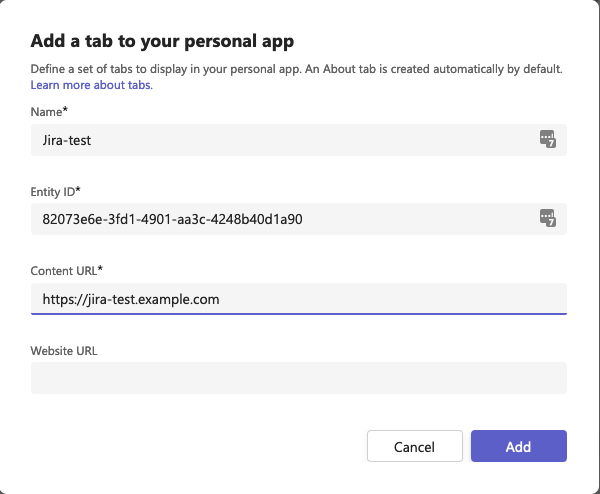
You may also want to enable the possibility to add your the app in a Team or Channel in Teams. To do this, create a
Group and channel app.To set up pressApp featuresin left menu and selectGroup and channel app. AsConfiguration URLinsert depending on your product:
Confluence: https://<your-confluence-server>/login.action?teamsUnderConfiguration
Jira: https://<your-jira-server>/login.jsp?teamsUnderConfiguration
Bamboo: https://<your-bitbucket-server>/userlogin!doDefault.action?teamsUnderConfiguration
Bitbucket: https://<your-bitbucket-server>/login?teamsUnderConfiguration
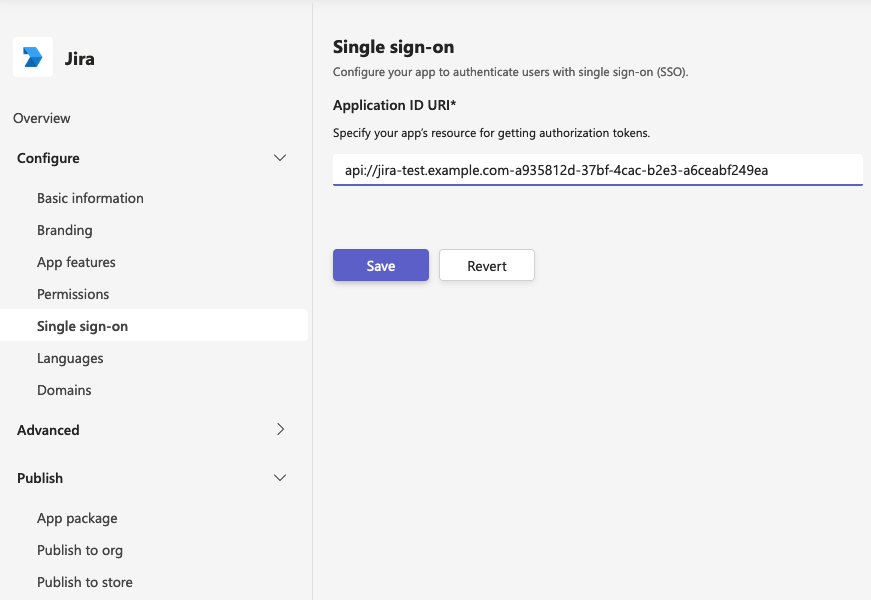
5. Click the Single sign-on left menu and insert the API URL from the Azure AD section above in this guide and press Save.
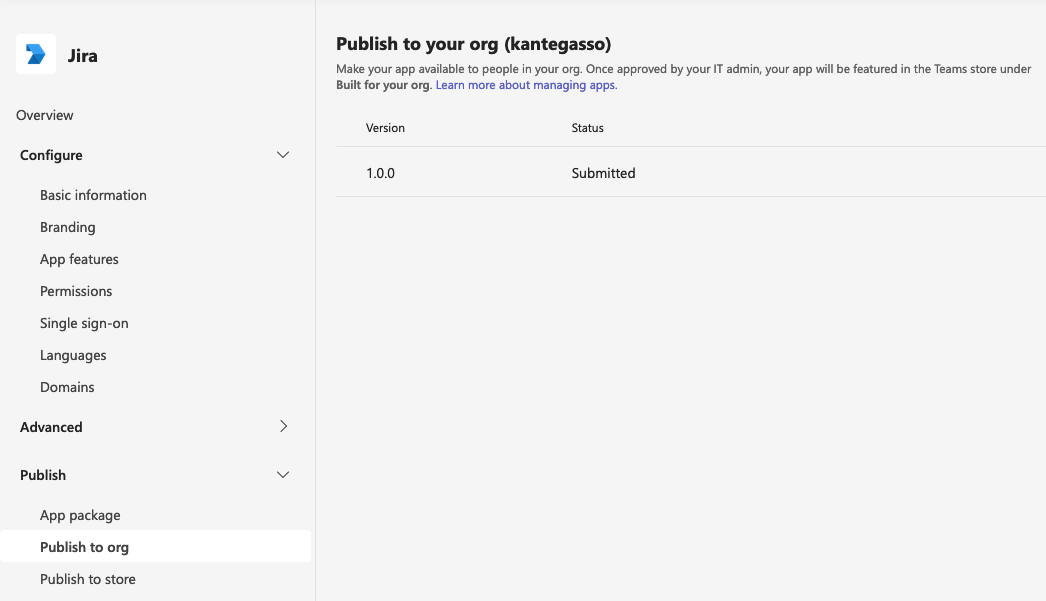
6. The app should now be ready and you should click left menu
Publish to org. If you get problems publishing, verify that all mandatory fields in the Basic information section is set.
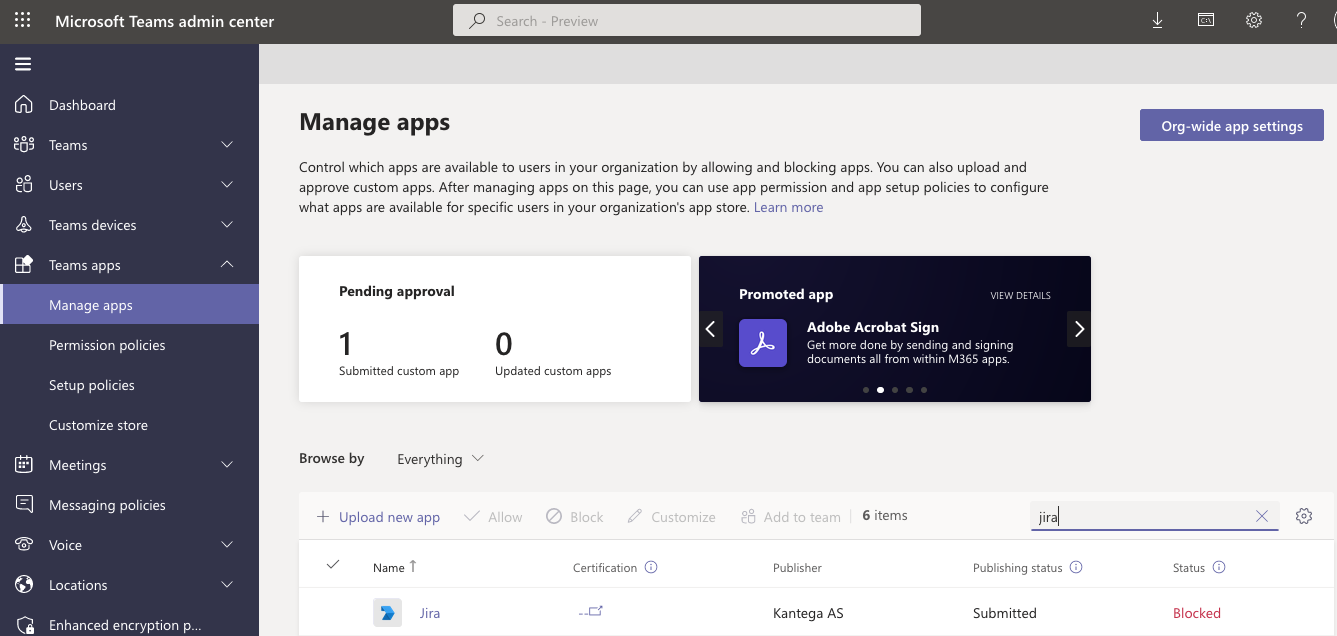
7. Now you must use an Teams Administrator account to approve the app. Please navigate to Teams Administation
Manage Apps section: https://admin.teams.microsoft.com/policies/manage-apps. Search for the name you chose for your published Teams app.
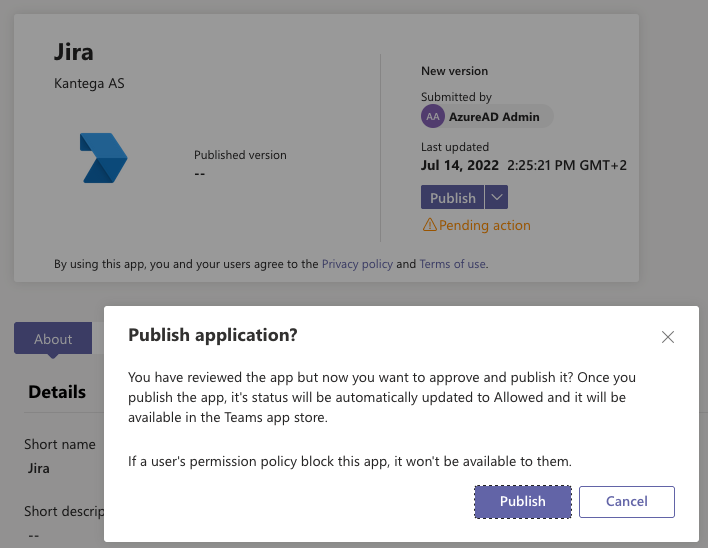
8. Click the new app in the list and click
Publish and Publish to confirm.
9. Your new app should in a short while be searchable from Teams.
10. Your users may now search to find the app in Teams and add it either to the left menu in Teams or as a tab in a Teams group or chat window.
If you have problems adding as a group app because the Save button is inactive it may help to log out from the Atlassian product in the window, press Back-button to the App list and re-select the app. This is because when loading group app the login page must be showing to allow communication between Teams and the Atlassian products.
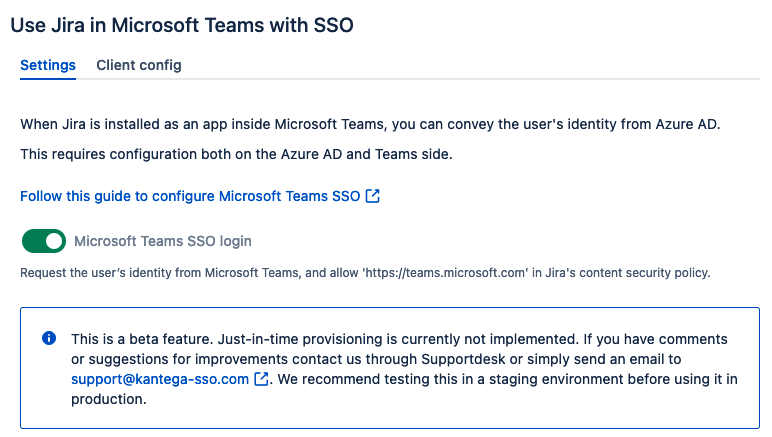
IV. Turn on Teams SSO login in Kantega SSO
Enable
Microsoft Teams SSO loginin Kantega SSO
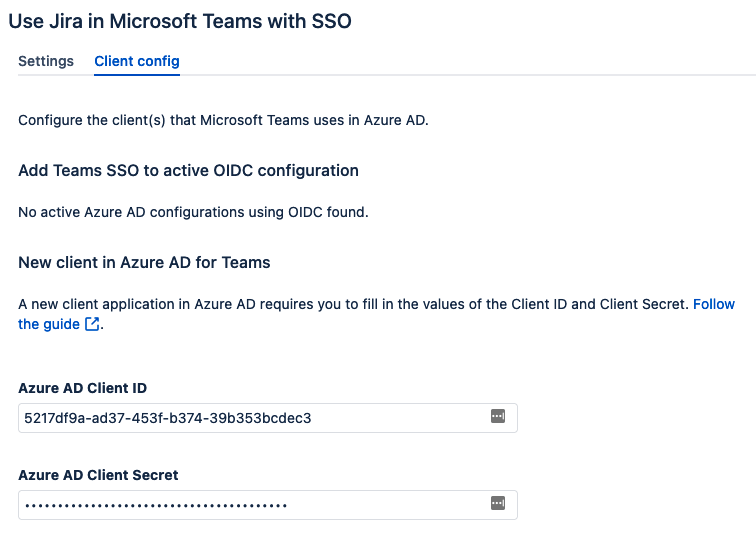
2. Navigate to Client config tab
If you were reusing one or more OIDC client application(s) in Azure AD you should not need to set
Client IDandClient Secrethere.If you set up a new client application in Azure AD also give in the values of
Client IDandClient Secret.
3. And at last you should be able to log into your Atlassian product in a Team app.