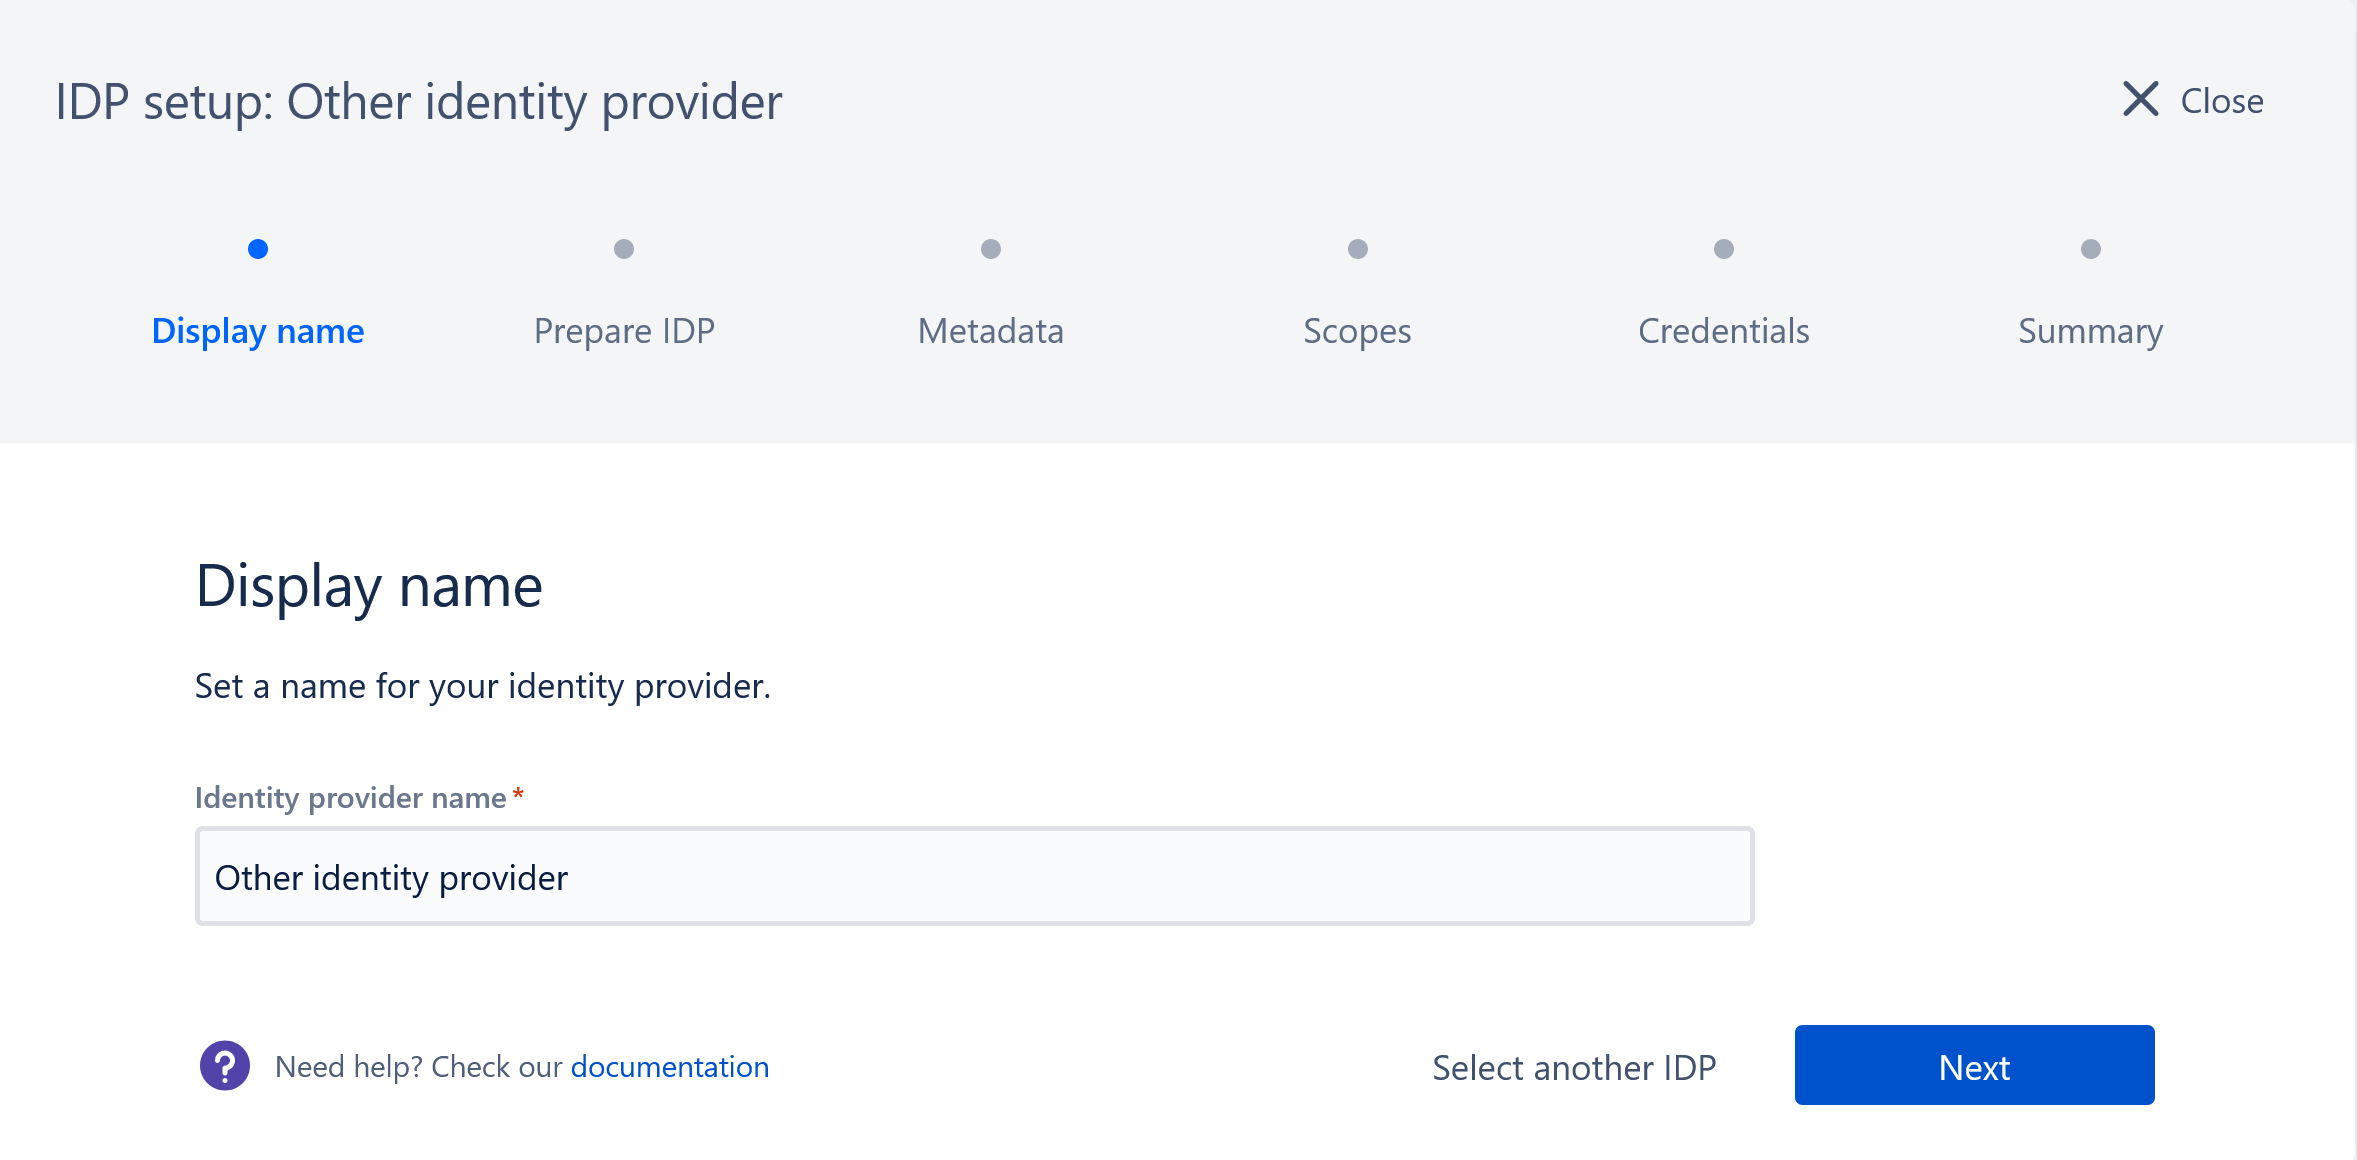
1. Display name
Choose a name for your identity provider. This is the user-facing name, so choose a name your users will recognize. This value can be changed later.
2. Prepare IdP
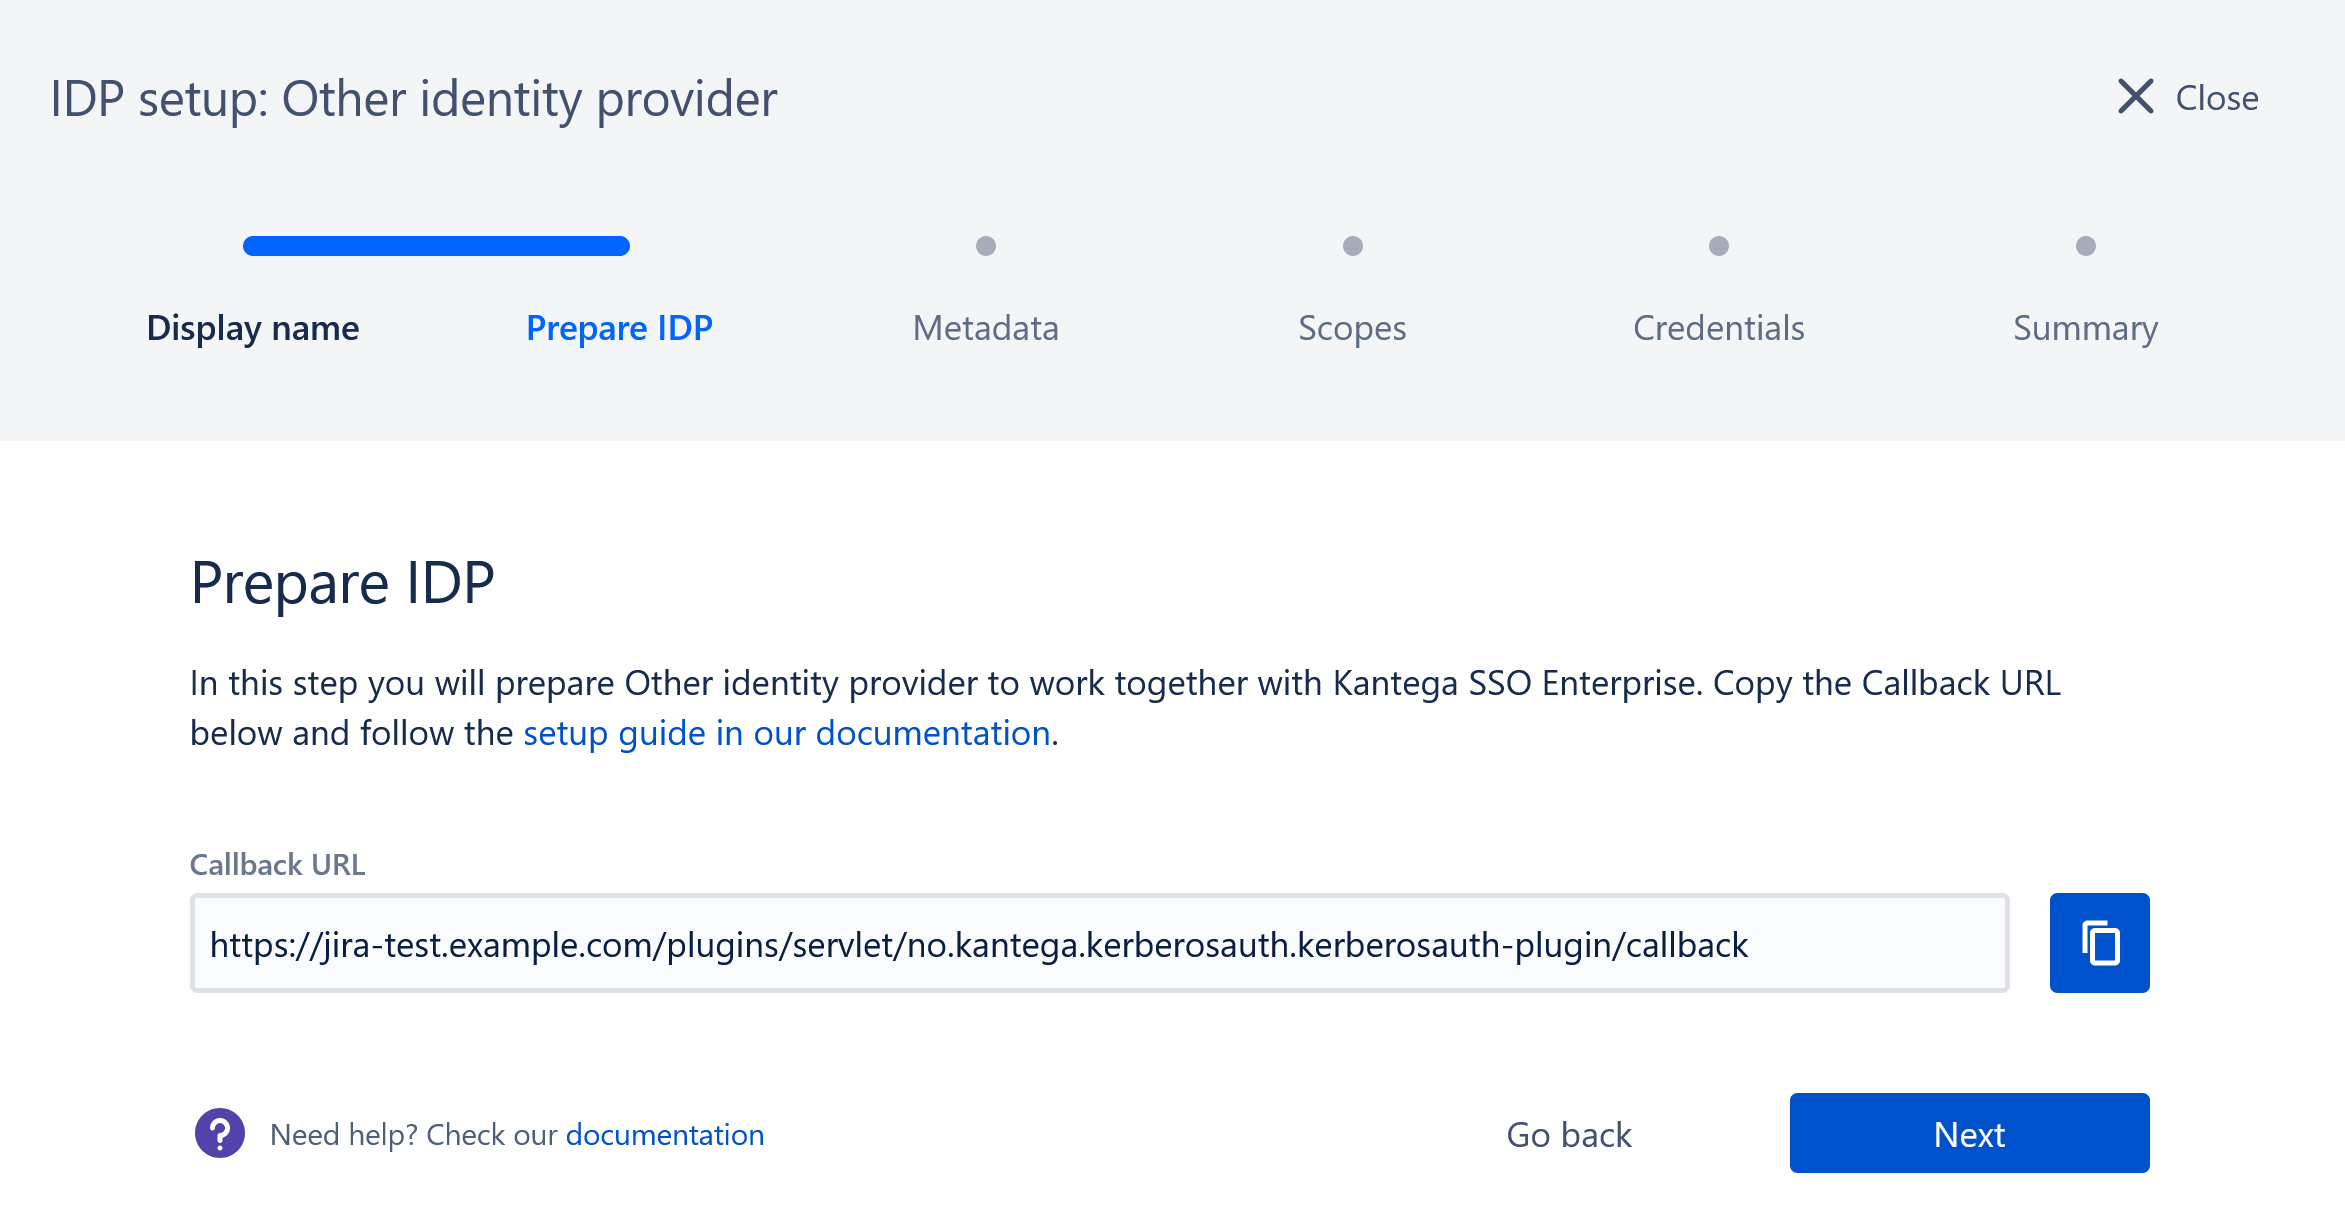
Copy the callback URL and add it to the corresponding field in your identity provider. The name of this field can vary, but it is typically also named reply URL or redirect_uri. This is the URL your identity provider will redirect the user back to after the user has authenticated with their credentials. You can read more about this field in the OpenID Connect specification under 3.1.2.1. Authentication Request.
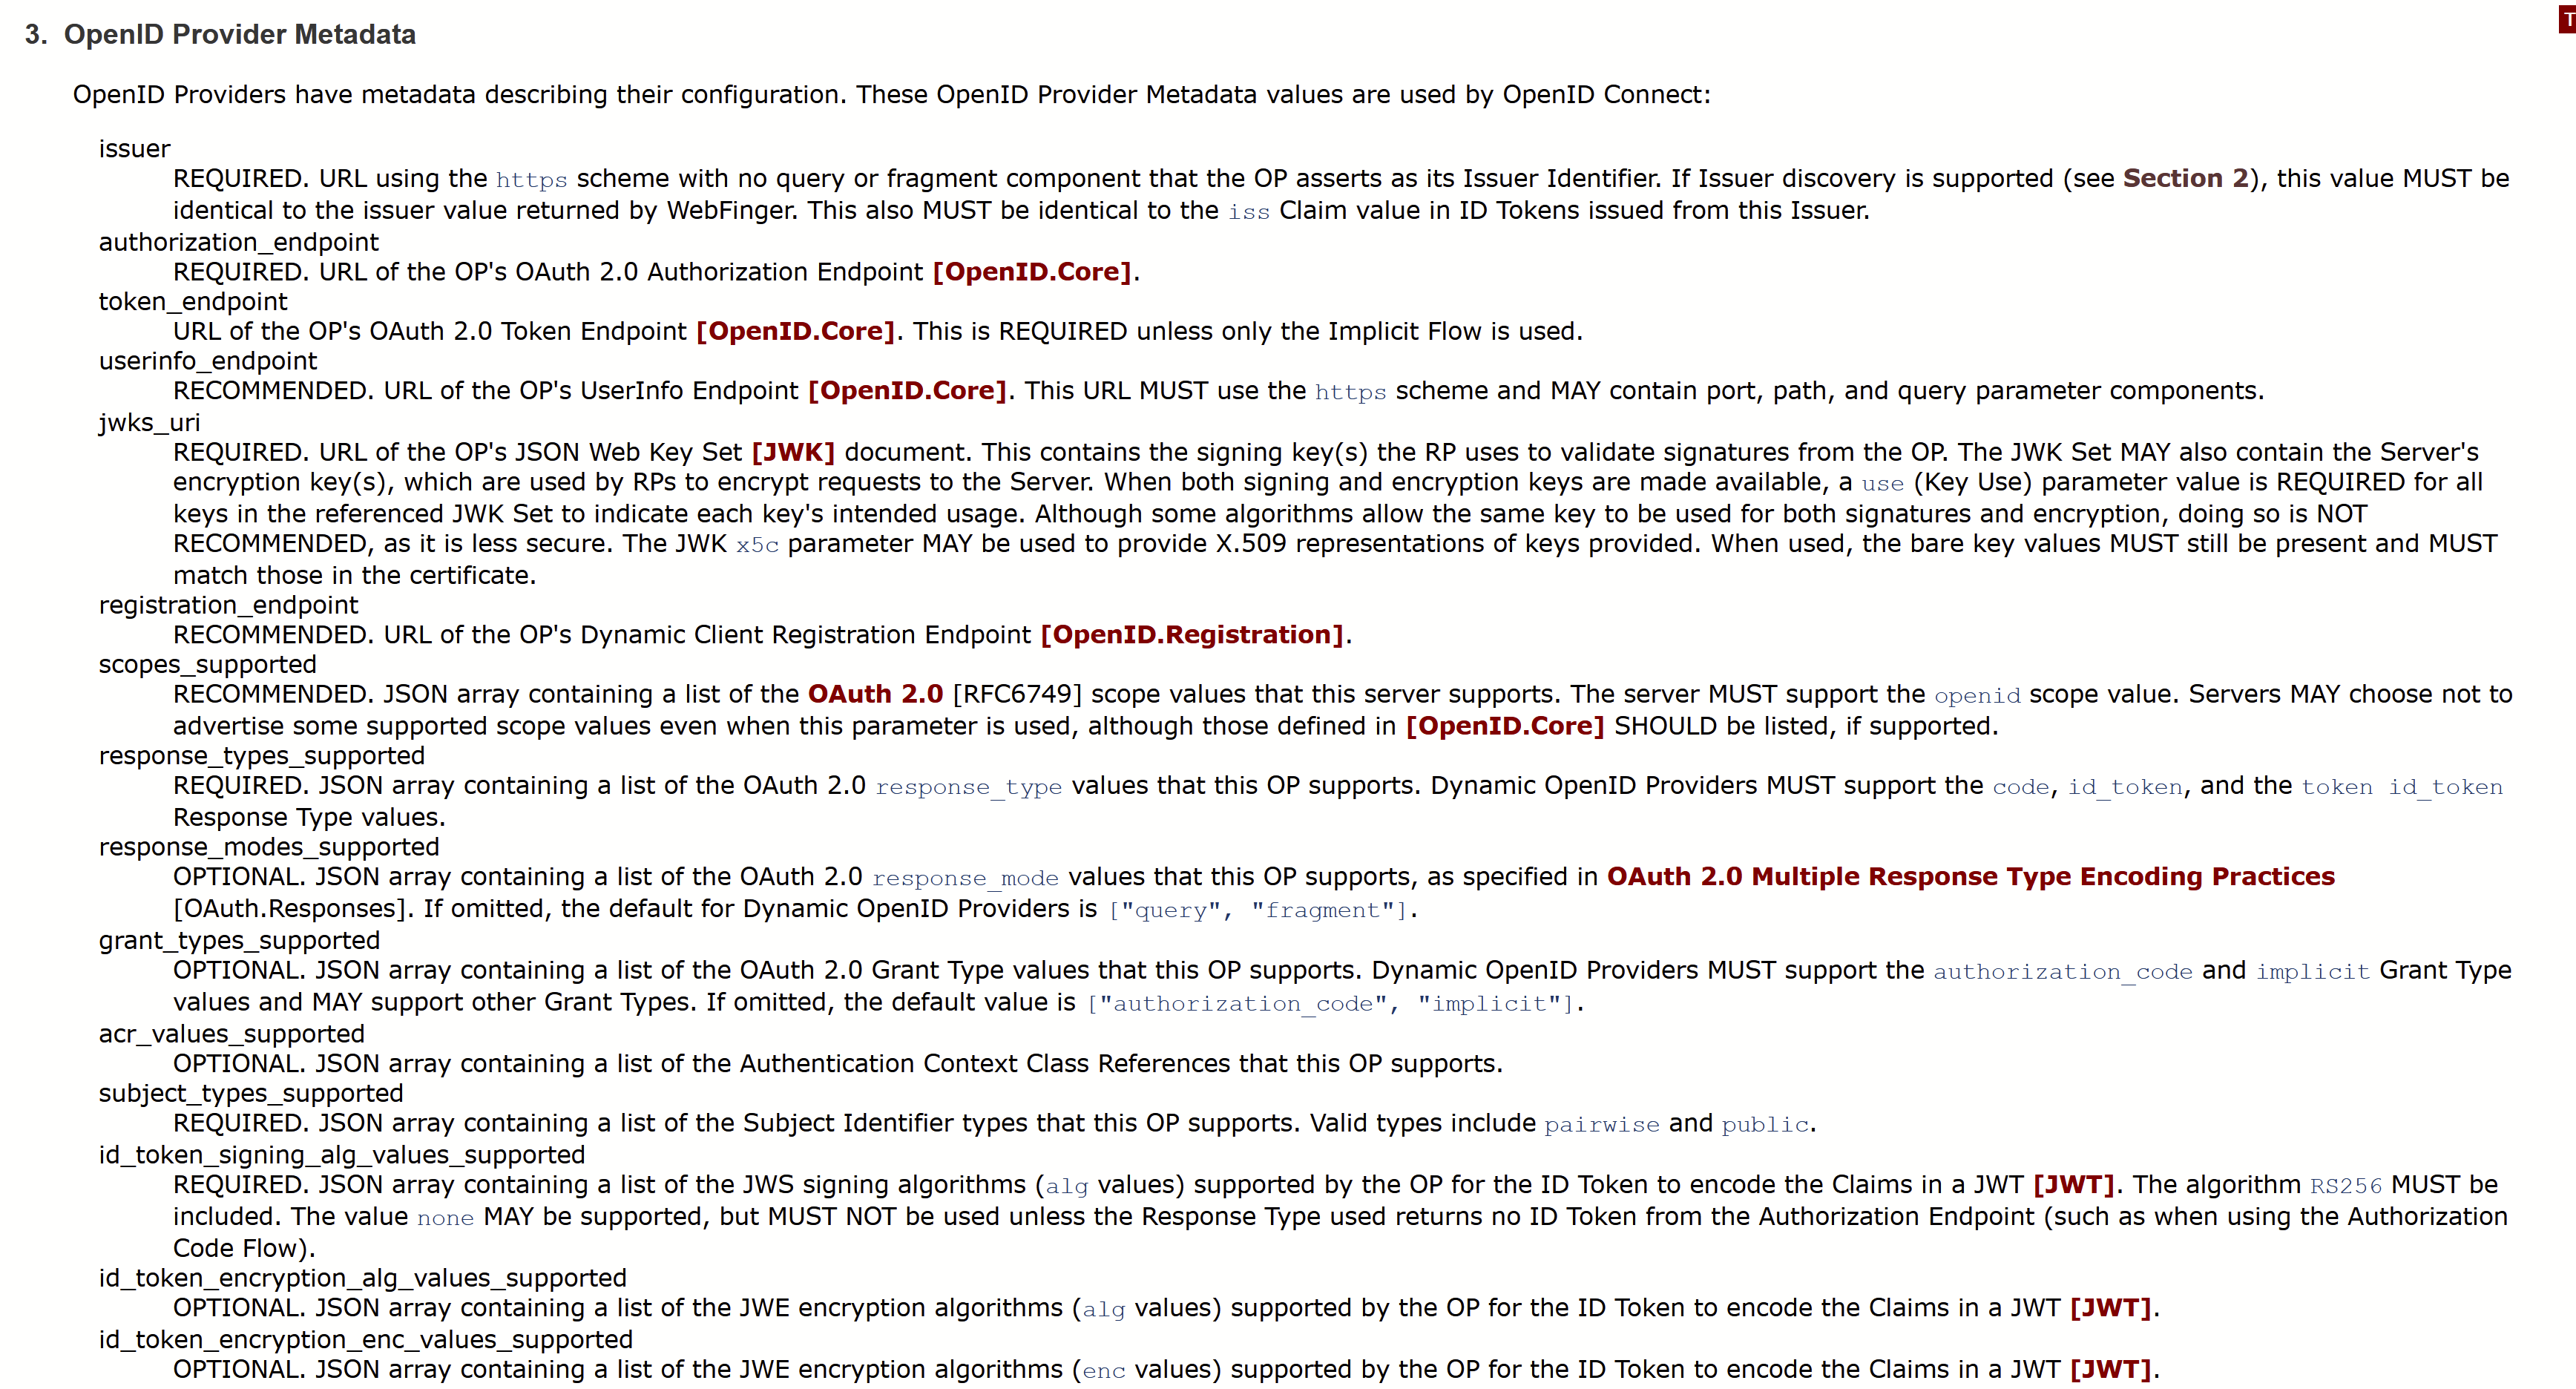
3. Metadata
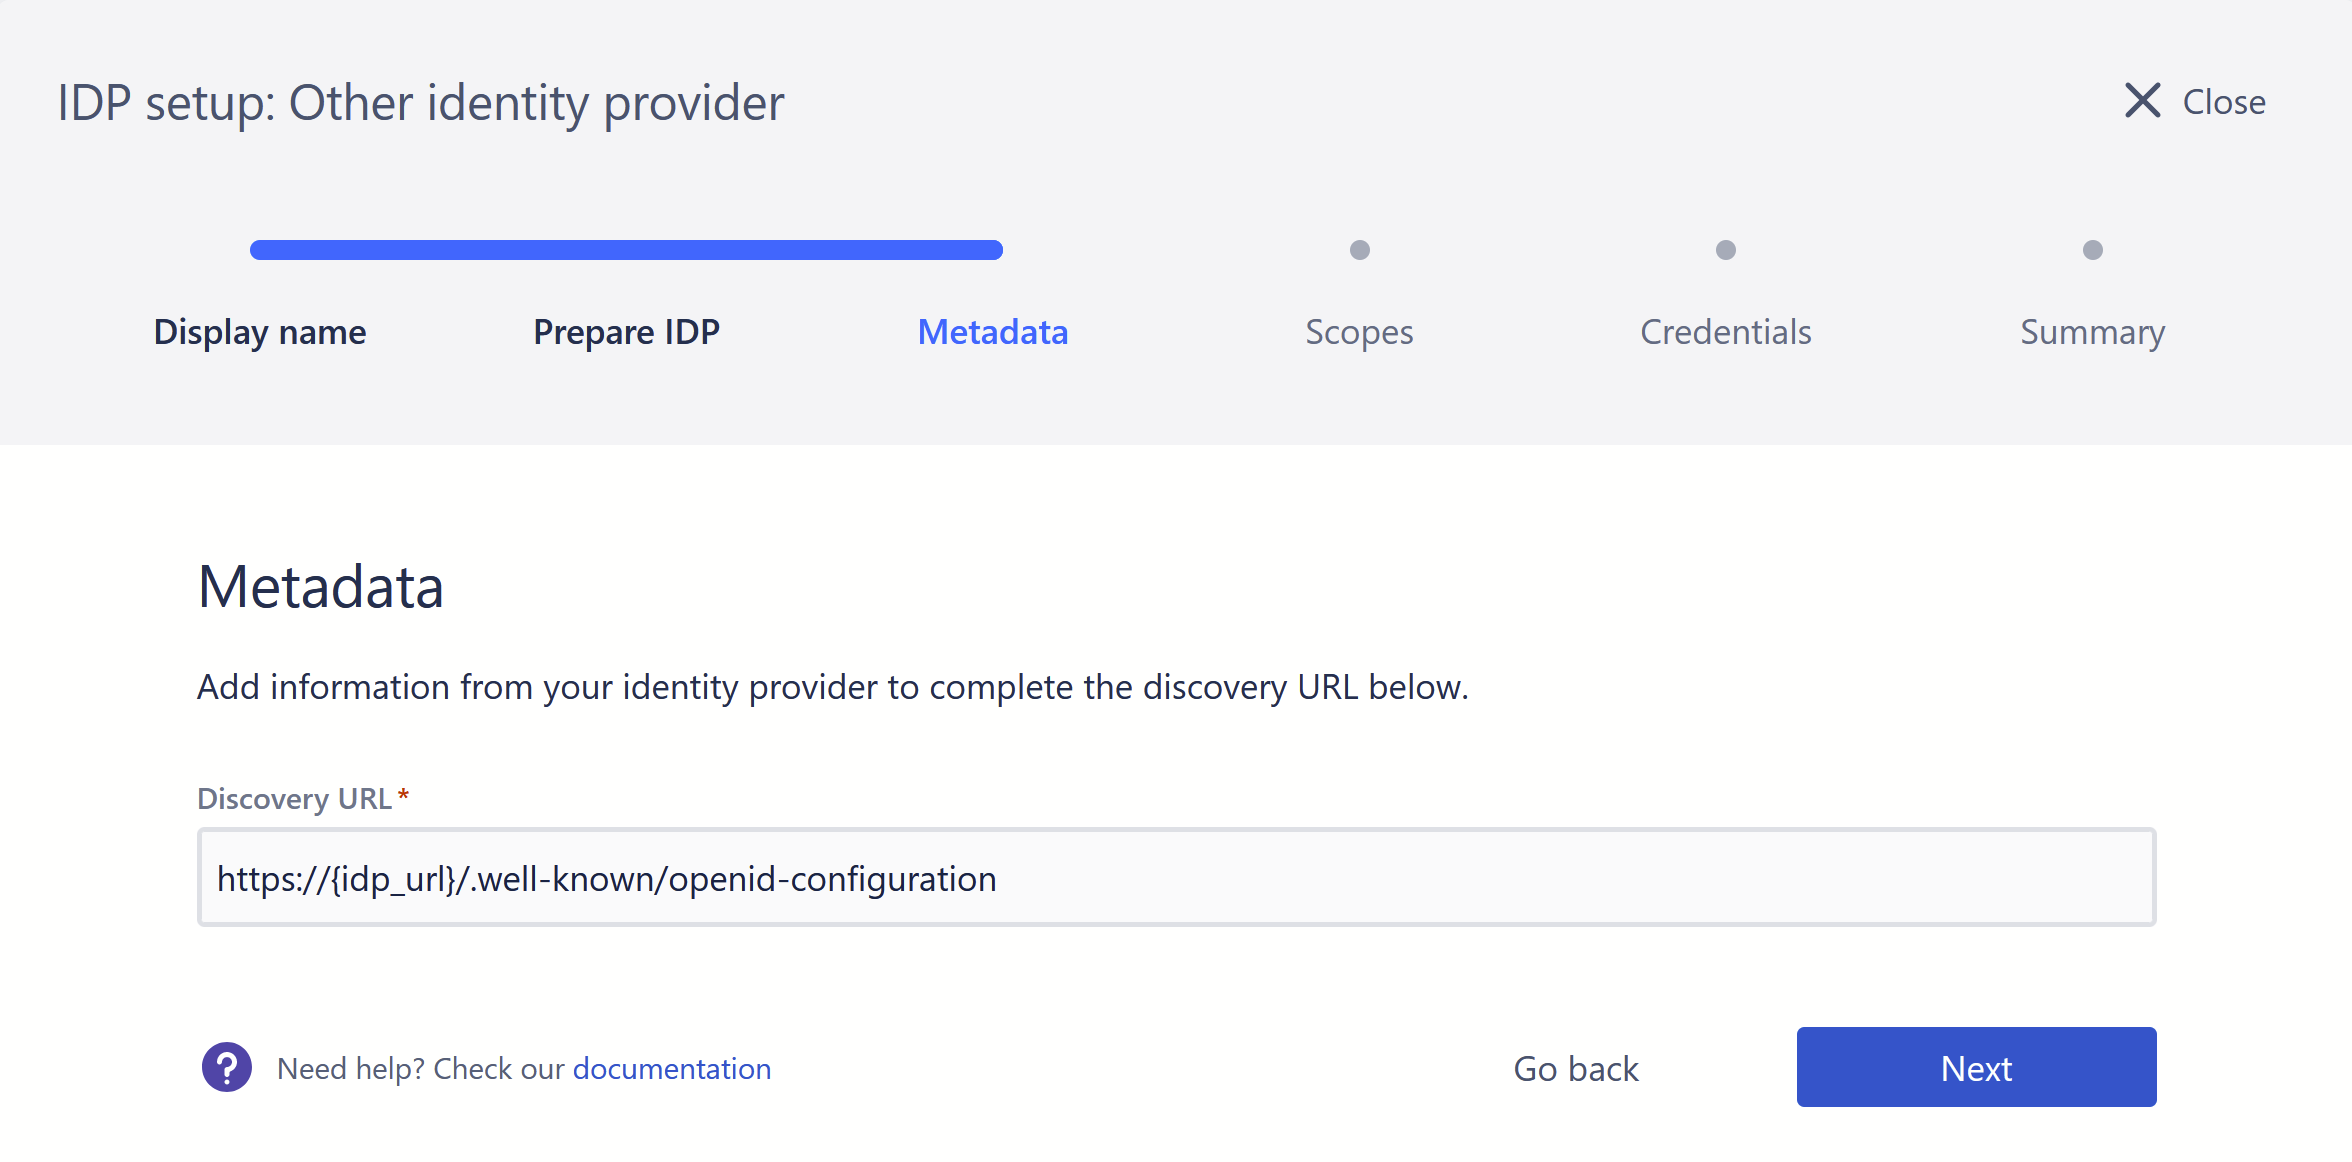
Kantega SSO requires a metadata URL from you identity provider to get access to the necessary information about its configuration in the OIDC authorization code flow. In the OpenID Connect specification, this process is called Discovery, in that the client dynamically discovers information about the Identity provider.
This metadata URL typically comes on the format https://<idp-server-url>/.well-known/openid-configuration, and exposes a JSON document describing the necessary information for the protocol. The typical values described in the metadata document are below: