| Info |
|---|
This is a feature in Kantega SSO to support running the Atlassian products Confluence, Jira, Bamboo, and Bitbucket as apps in Microsoft Teams. Kantega SSO also gives you single sign-on using your user’s identity from Azure ADMicrosoft Entra ID. If you are planning on running Microsoft Teams in browsers and not only as a standalone app, you will have to consider getting samesite cookies to work for the Atlassian apps when loaded in the Teams app, because of issues with Iframes and samesite cookies.. This problem is expained here: https://jira.atlassian.com/browse/CONFSERVER-59298 |
...
Setup in detail
Below the above 4 steps will be described in details for Jira. Note that step I only is applicable for Confluence.
I. For Confluence only: Disable anti clickjacking protection and enable protection in Kantega SSO
...
...
Steps to prepare Confluence
Follow this guide to disable the built-in anti clickjacking protection in Confluence: https://confluence.atlassian.com/confkb/confluence-page-does-not-display-in-an-iframe-827335781.html
...
Turn on Content Security Policy switch to give similar protection, but allowing for Confluence to be loaded in Microsoft Teams.
...
| Info |
|---|
The Content Security Policy switch is only available for Confluence. For other products this is included in the Enable Microsoft Teams SSO login switch. |
II. In
...
Entra ID set up Teams SSO configuration
Prepare App registration, Client ID and Client Secret
Log into Microsoft Entra ID with an administrator account. Search in top bar for
App registrationsand navigate to this page. During these next steps you shold create and copy the valuesClient ID,Client SecretandAPI urlto use in later sections.If you have an existing Entra ID OIDC client application set up in Kantega SSO you may use this. See where to find Client IDs in the below screenshot:
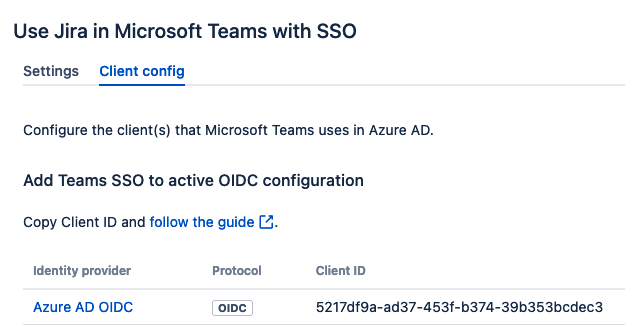
You may search for the Client ID in the search bar of Entra ID. Open your existing client appliction and skip to point 6.
If you do not have an existing OIDC client application continue to step 3.Press New registration, set a name for your new client application and press Register. You do not have to fill any of the other fields on this page.

Copy Client ID to use in later steps.
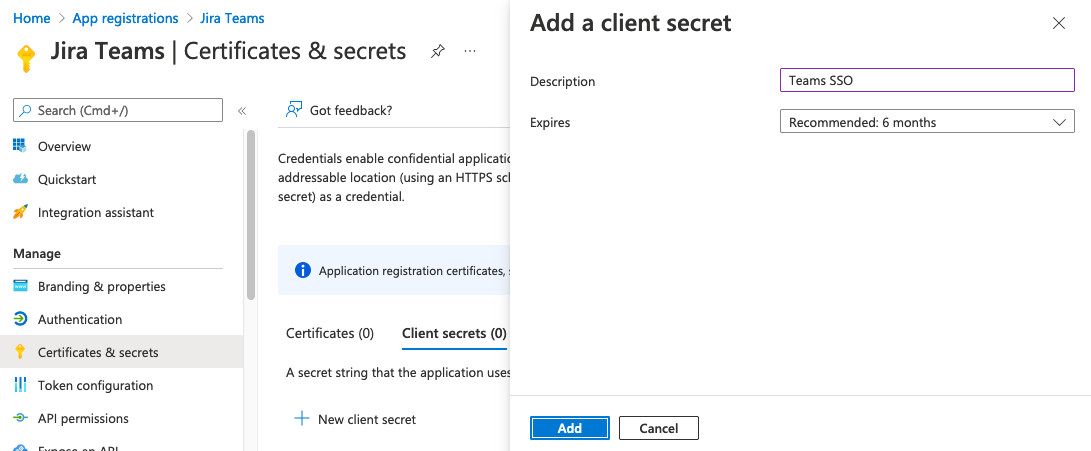
Click left menu to
Certificates & secrets and click New client secret. Type a suitable description, set appropriate expiry, and click Add. Copy the Secret Value of the new secret for later steps, and not the Secret ID.
| Expand | ||
|---|---|---|
| ||
|
...
|
...
|
...
 You may search for the Client ID in the search bar of Azure AD. Open your existing client appliction and skip to point 6.
3. Press New registration, set a name for your new client application and press Register. You do not have to fill any of the other fields on this page. 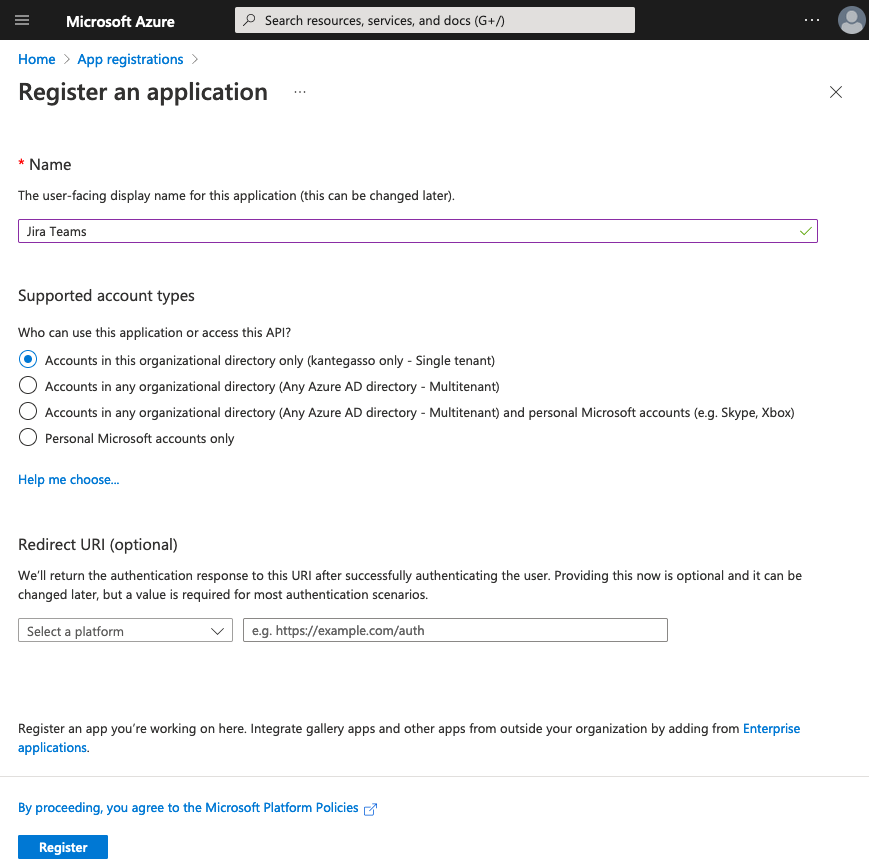 4. Copy Client ID to use in later steps. 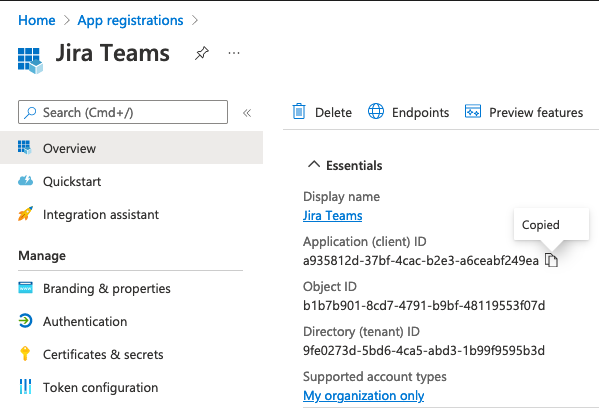
 |
| Expand | ||
|---|---|---|
| ||
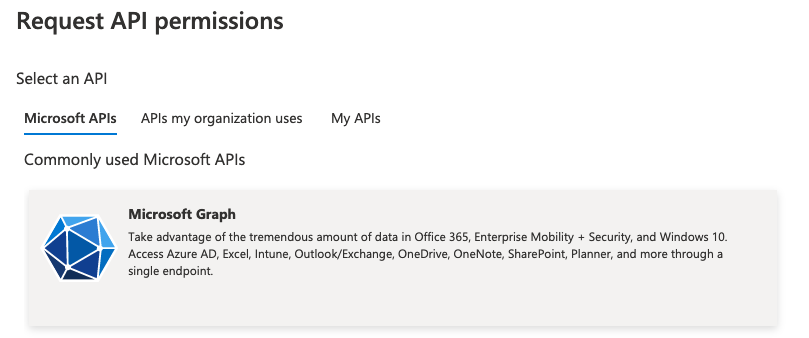
6. Click into API permissions and Add permissions. 
  8. Press 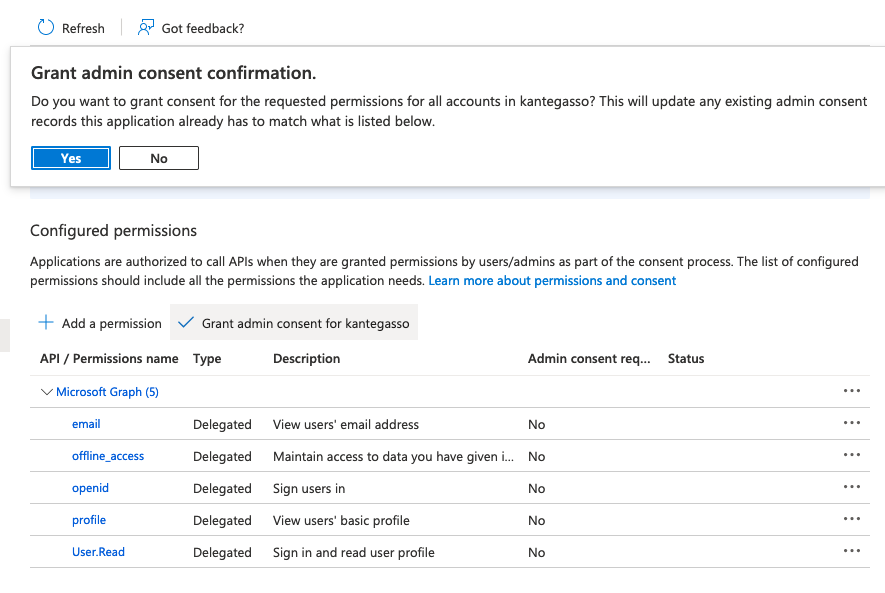 |
| Expand | ||
|---|---|---|
| ||
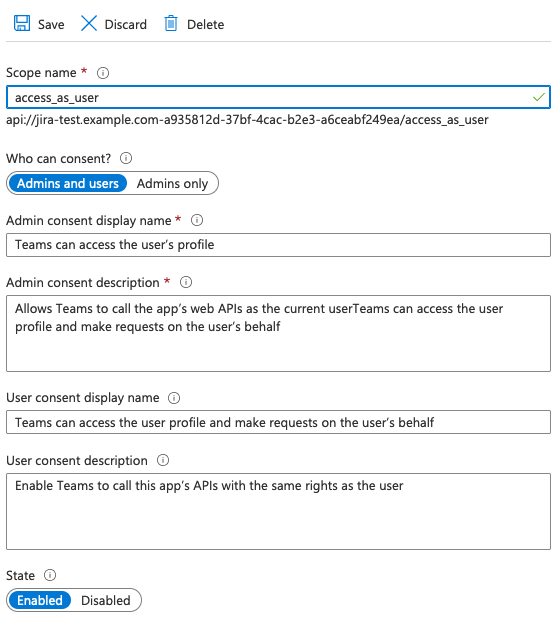
9. Click 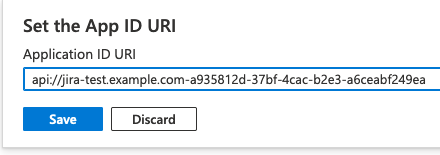 api:// Please note the “-” between the two values above. Copy the api address for later use and press
 11. Add Microsoft Teams client application IDs by pressing
Make sure to select Authorized scopes before you press 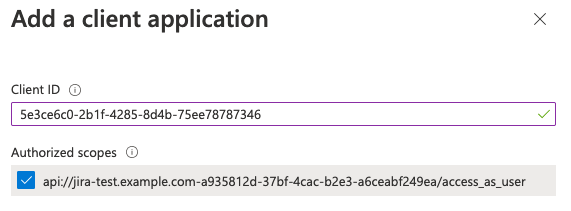  Afterwards this section should look like this: 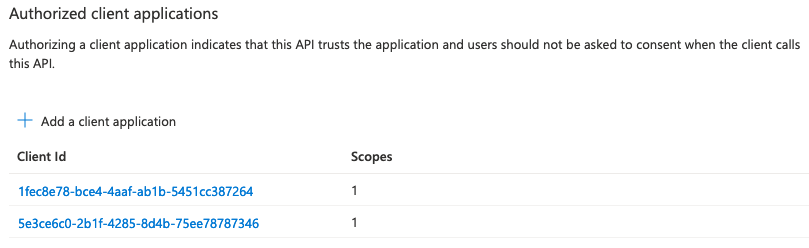 12. Then go to the  |
III. Create Teams App and deploy for use in your company’s Teams tenant
...