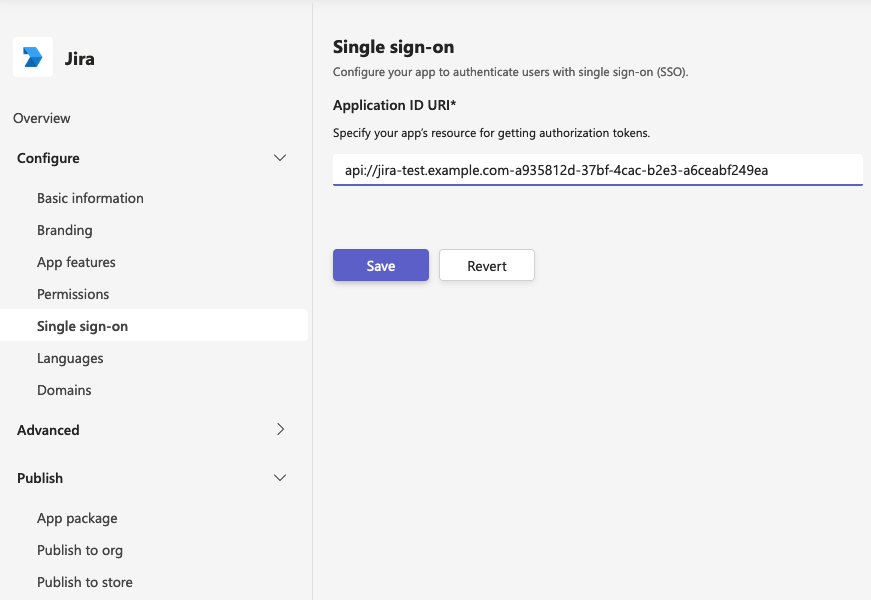
9. Click Expose and API in left menu. Click Application ID URI SetAdd button on top. The App ID URI should be set to this address: 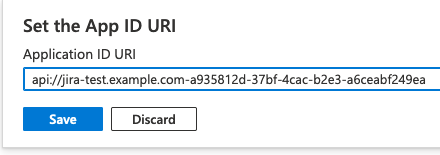 api://<your-atlassian-server-name-without-portnumber>-<Client ID value-from-step-4> Please note the “-” between the two values above. Copy the api address for later use and press Save.
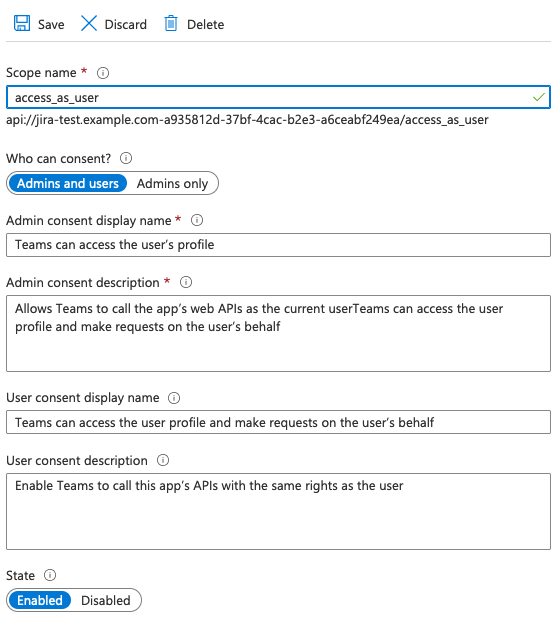
10. Press Add a scope and insert the following scope values in the panel that appears:
, enter access_as_user as the Scope name. Set Who can consent? to Admins and users. To configure the admin and user consent prompts with appropriate values for access_as_user scope, provide the following information in the fields: Enter Teams can access the user’s profile as Admin consent display name. Enter Allows Teams to call the app’s web APIs as the current user as Admin consent description. Enter Teams can access the user profile and make requests on the user’s behalf as User consent display name. Enter Enable Teams to call this app’s APIs with the same rights as the user as User consent description. Ensure that State is set to Enabled.
11. Add Microsoft Teams client application IDs by pressing Add a client application and using the below values:
1fec8e78-bce4-4aaf-ab1b-5451cc387264 (Teams mobile or desktop application) 5e3ce6c0-2b1f-4285-8d4b-75ee78787346 (Teams web application)
Make sure to select Authorized scopes before you press Add application for the two values: 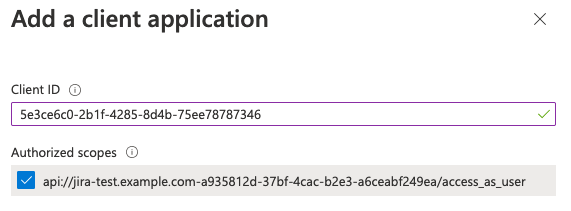  Afterwards this section should look like this: 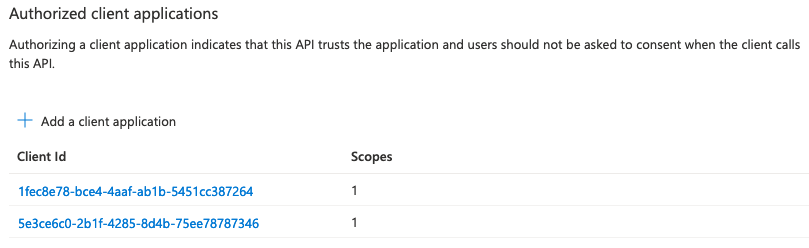
12. Then go to the Manifest left menu page, set value "accessTokenAcceptedVersion": 2,and press Save. 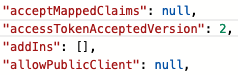 |