...
| Expand | ||
|---|---|---|
| ||
2. Turn on Content Security Policy switch to give similar protection, but allowing for Confluence to be loaded in Microsoft Teams. 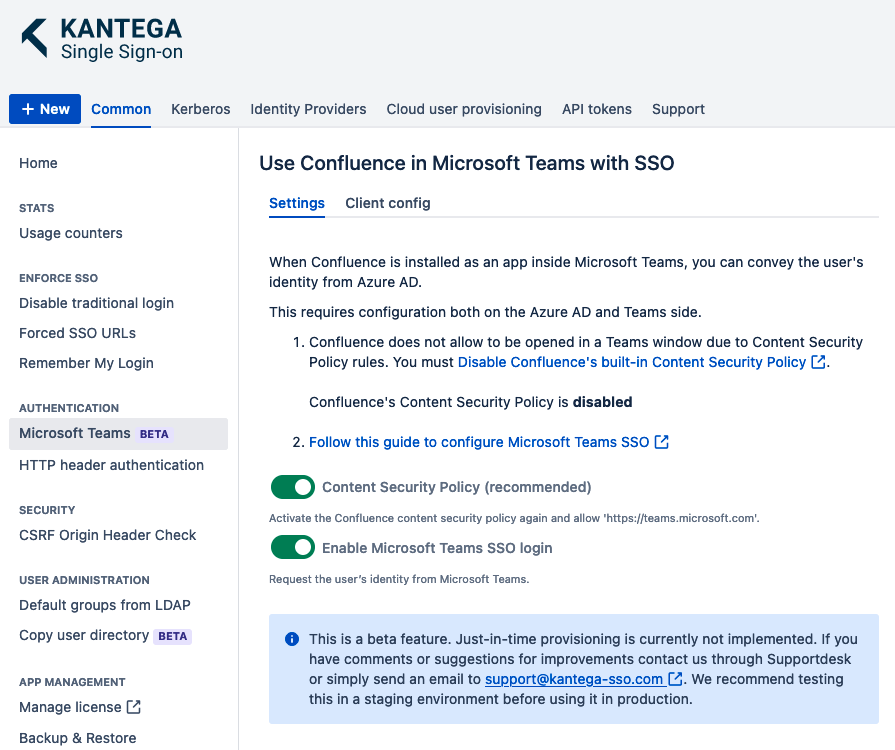
|
...
| Expand | ||
|---|---|---|
| ||
2.
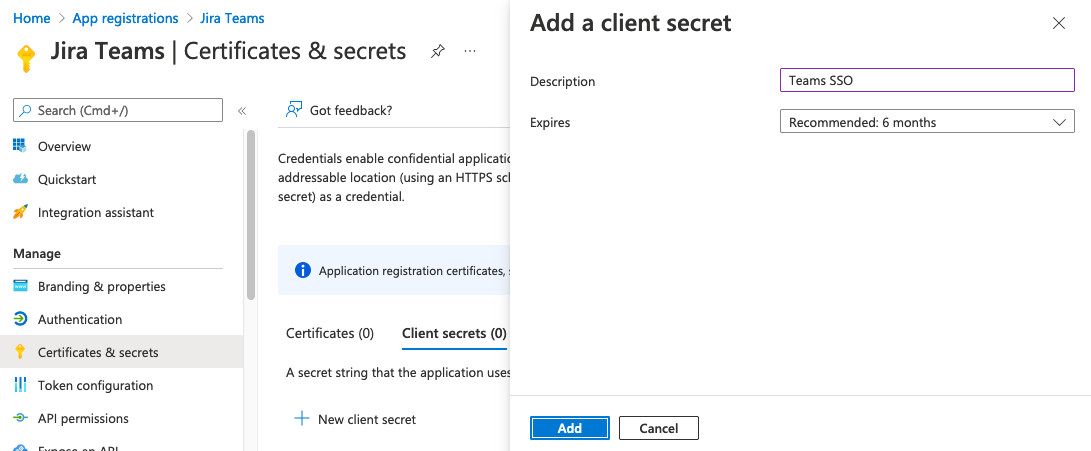
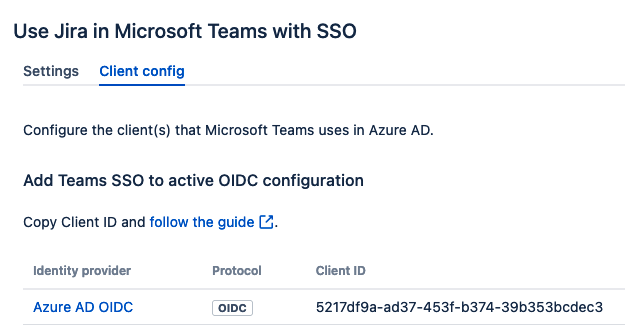 You may search for the Client ID in the search bar of Azure AD. Open your existing client appliction and skip to point 6.
3. Press New registration, set a name for your new client application and press Register. You do not have to fill any of the other fields on this page. 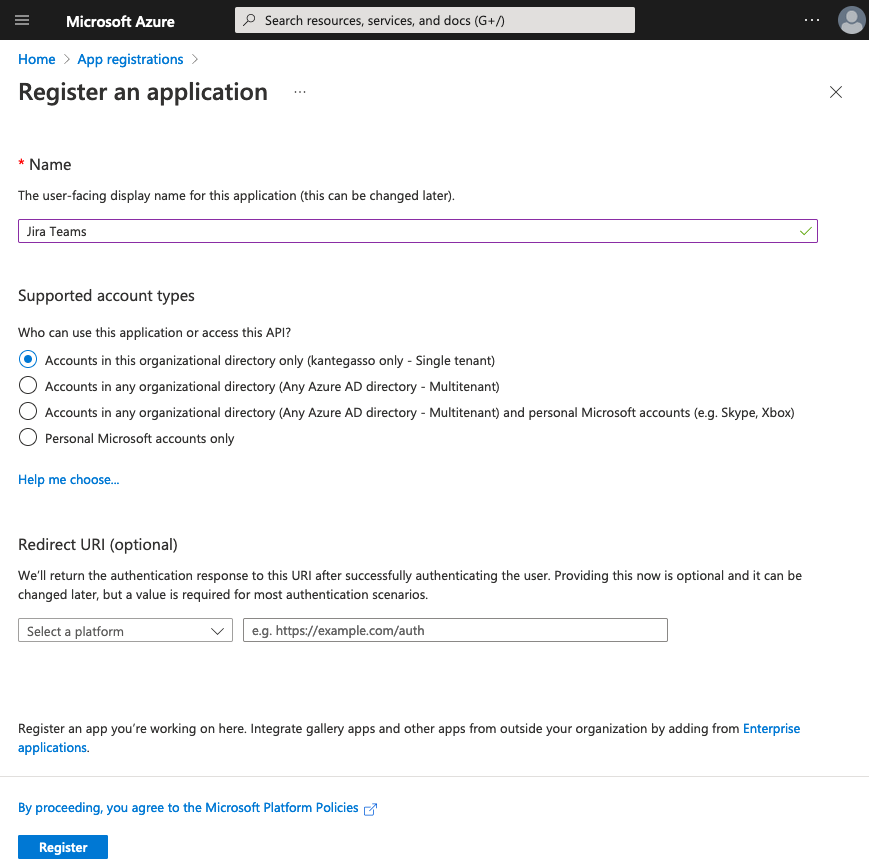 4. Copy Client ID to use in later steps. 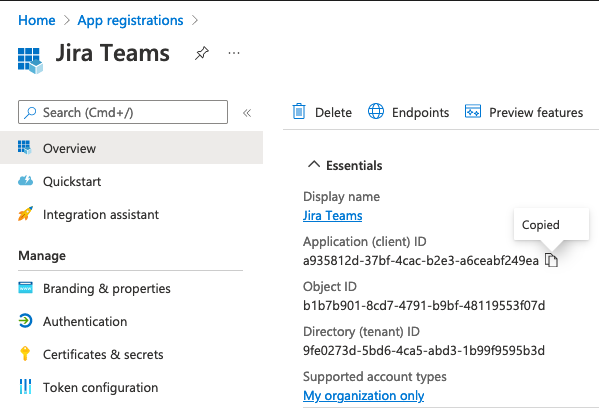
 |
...
| Expand | ||
|---|---|---|
| ||
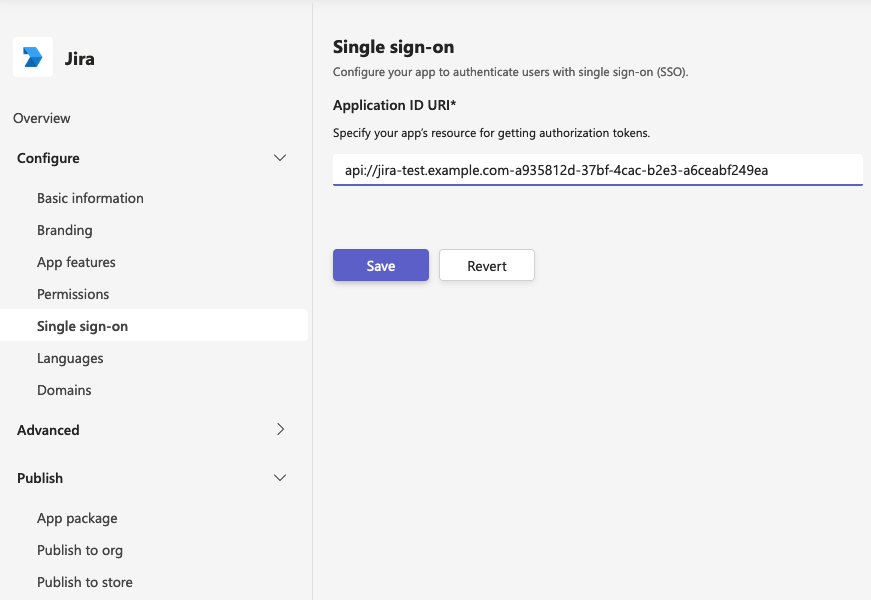
9. Click 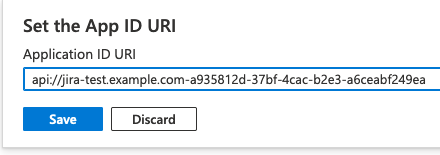 api:// Please note the “-” between the two values above. Copy the api address for later use and press
 11. Add Microsoft Teams client application IDs by pressing
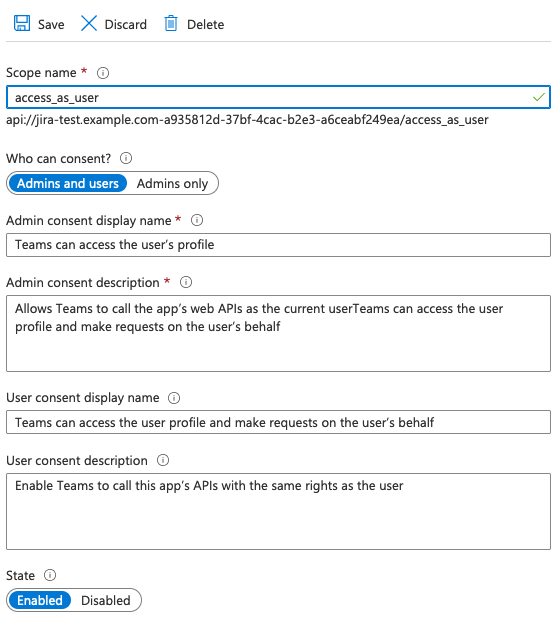
Make sure to select Authorized scopes before you press 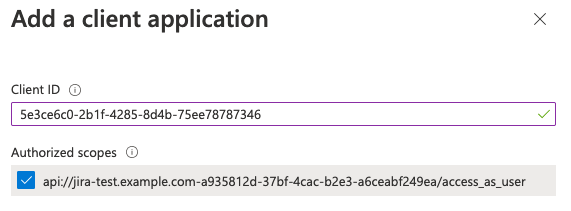  Afterwards this section should look like this: 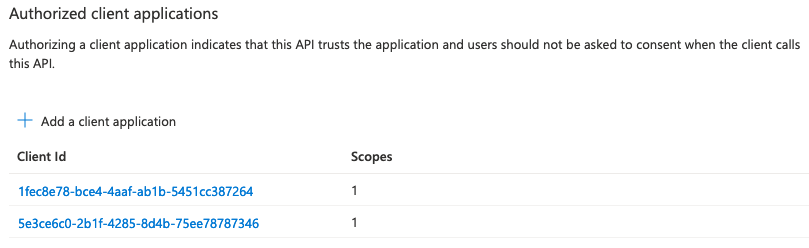 12. Last Then go to the  |
...
| Expand | ||
|---|---|---|
| ||
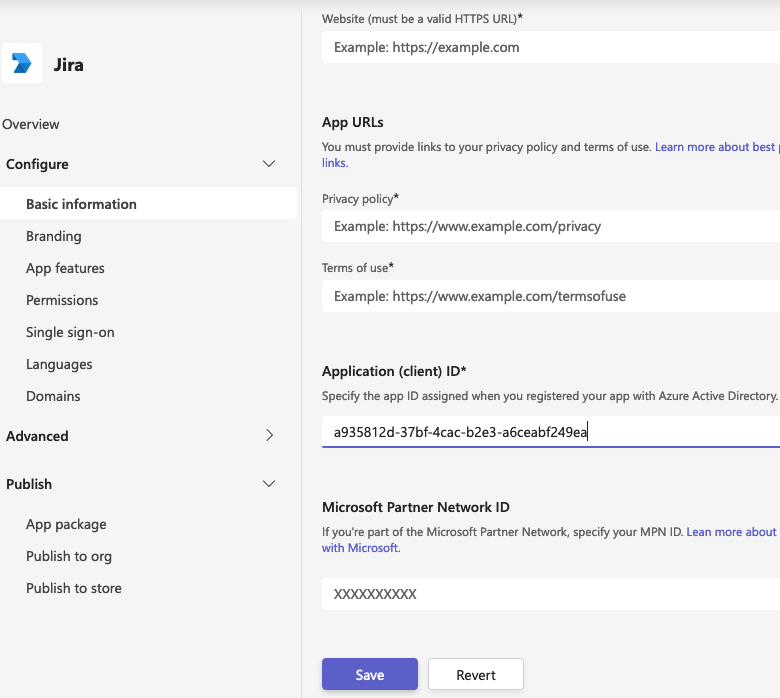
 2. Go to 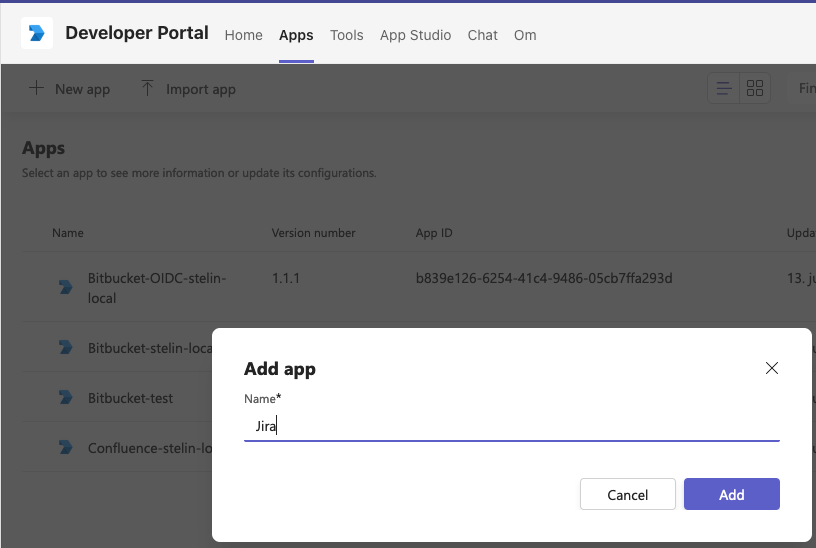 3. On the Basic information page you may give suitable values for your App. All the below values must be set to allow the appliation to be published later:
 |
| Expand | ||
|---|---|---|
| ||
4.
|
...
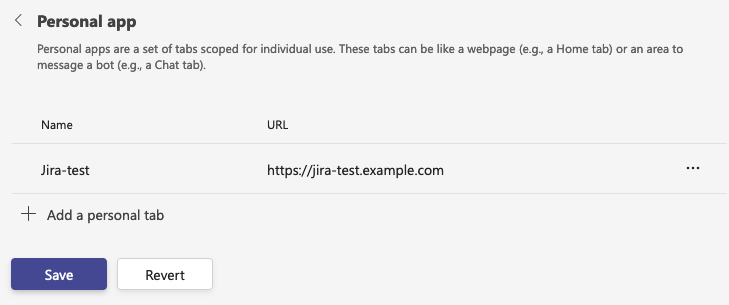
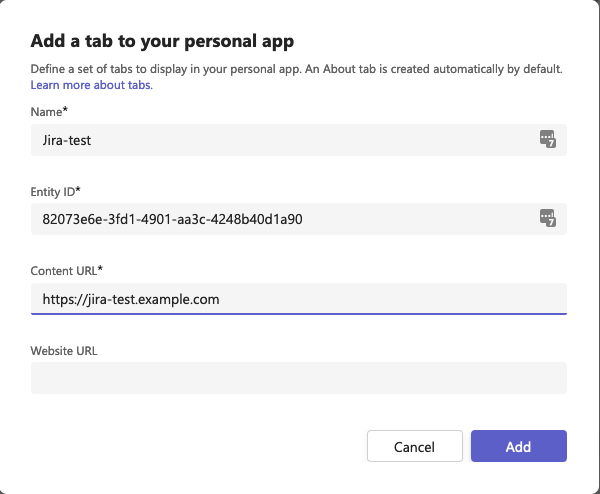
 6. The app should now be ready and you should click left menu
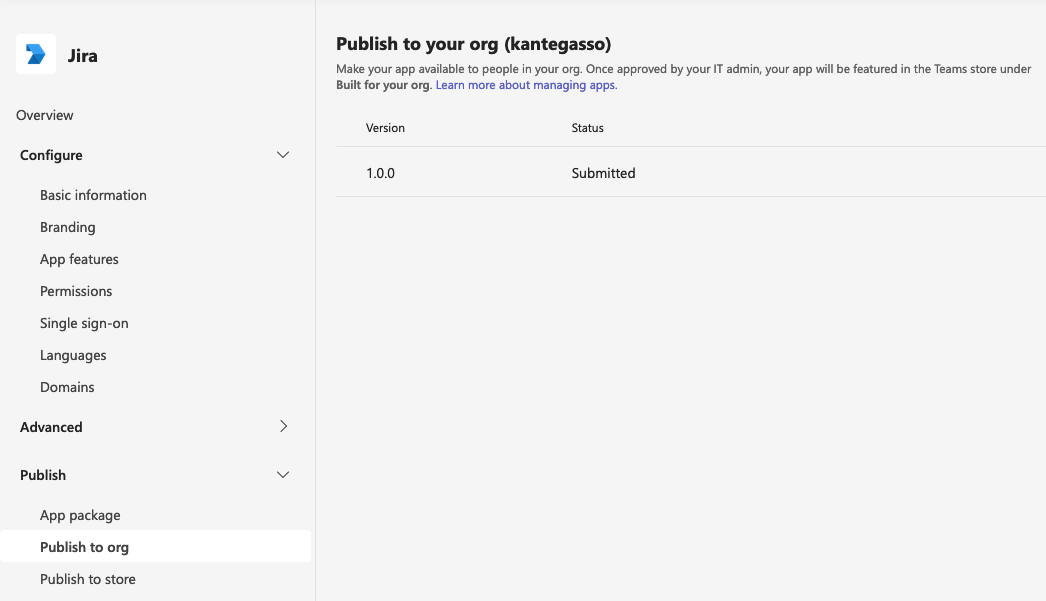 |

| Expand | ||
|---|---|---|
| ||
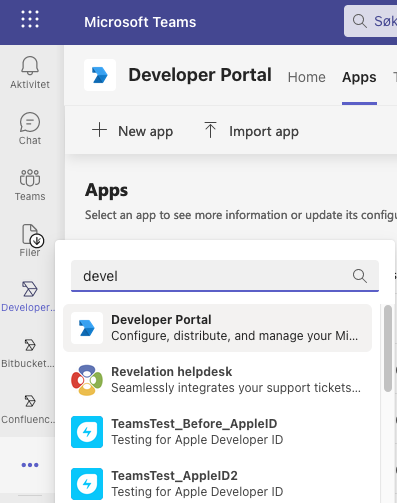
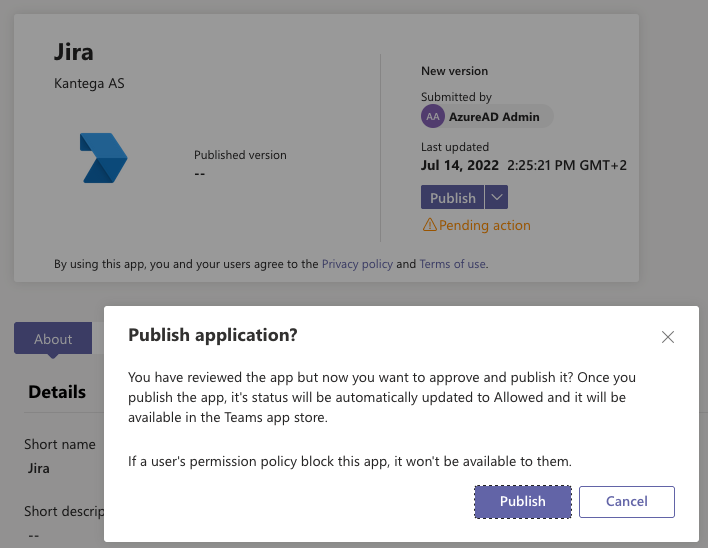
7. Now you must use an Teams Administrator account to approve the app. Please navigate to Teams Administation
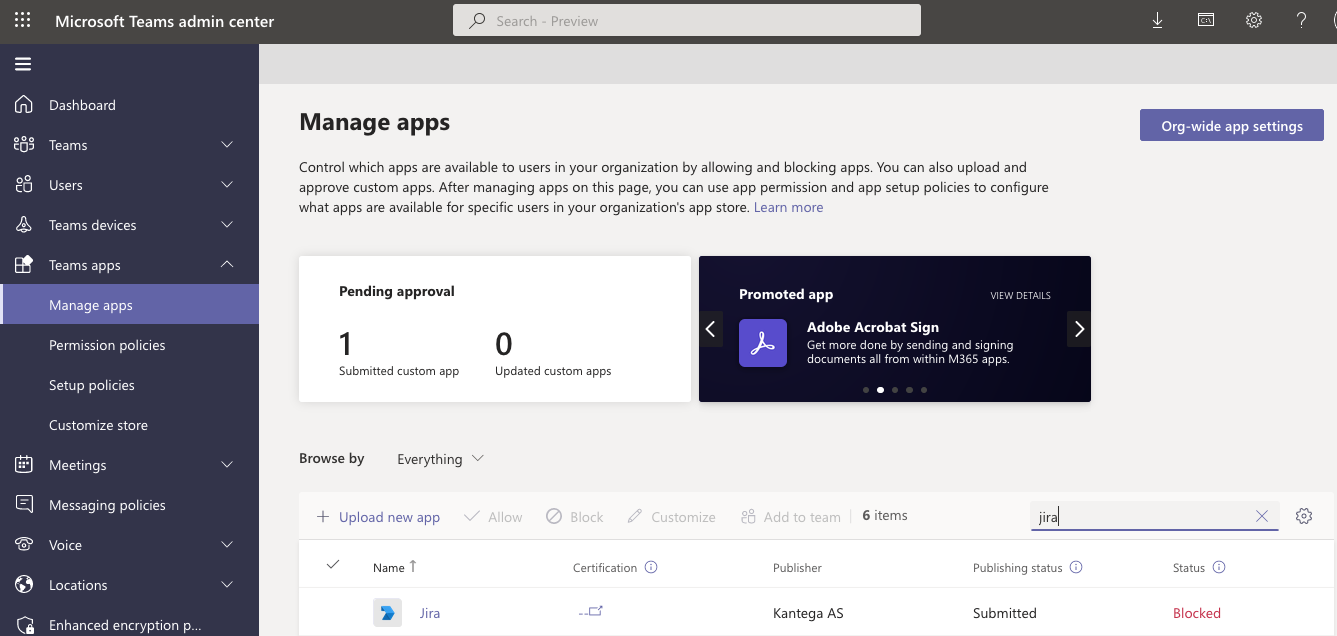 8. Click the new app in the list and click
 9. Your new app should in a short while be searchable from Teams. 10. Your users may now search to find the app in Teams and add it either to the left menu in Teams or as a tab in a Teams group or chat window. If you have problems adding as a group app because the 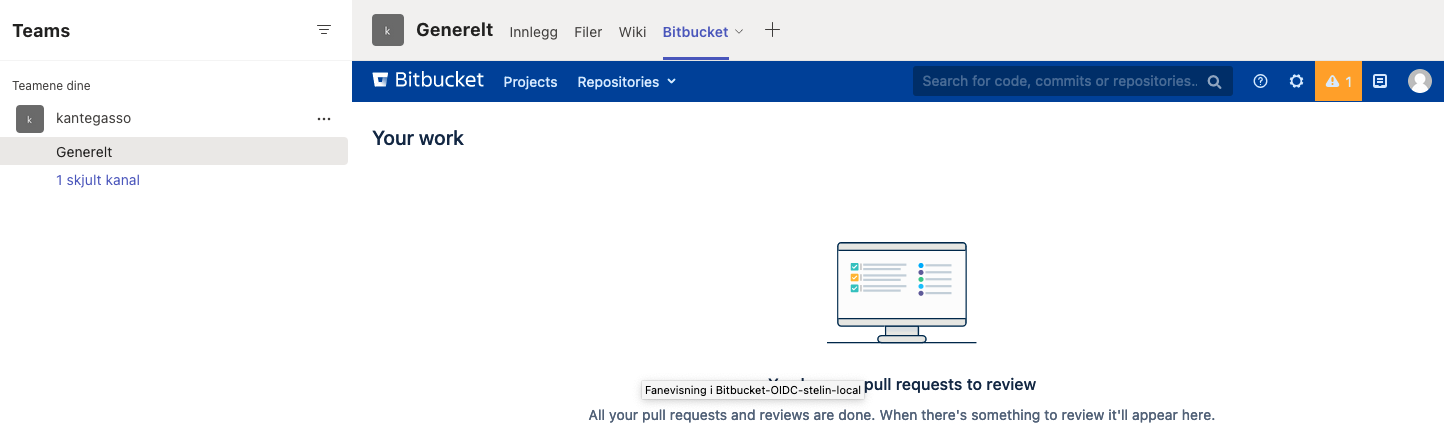 |
I. Turn on Teams SSO login in Kantega SSO
...