Follow the instructions below to set up provisioning of users from Microsoft Entra ID (Azure AD). Note, a Premium subscription is required for SCIM provisioning to be available. You also need a global administrator to enable provisioning. Read more in Microsoft's official SCIM documentation. |
When configuring SAML or OIDC later, you will want to use the non-gallery SCIM app you just created instead of the Kantega SSO SAML gallery app (the latter does not yet support SCIM). The SAML/OIDC steps should otherwise be identical. Make sure to select “accounts already exist” for the SAML/OIDC provisioning option. |
To begin the SCIM configuration, select Cloud user provisioning, then select Entra ID under the SCIM header from the Add directory dropdown.

Introduction and network preparation

Tenant configuration

Configure SCIM in Microsoft Entra ID
Open the Azure admin portal at https://portal.azure.com
Add a new application
Click the new application button (plus button at the top)
Select Create your own application

Give the application a suitable name
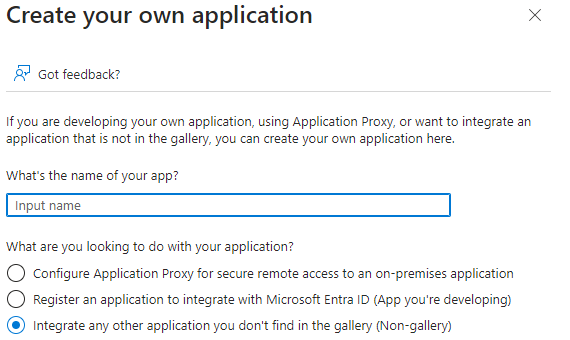
Click Create and wait a few seconds for the app to be created.
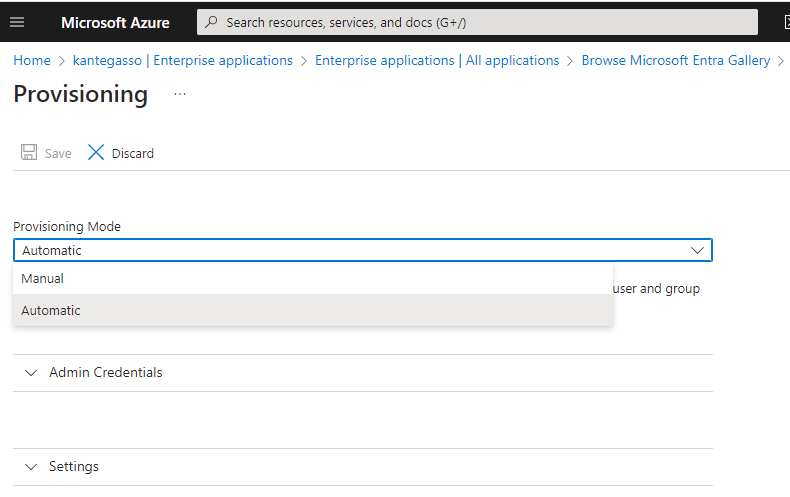
Enable automatic provisioning
Configure admin credentials
Expand the Admin credentials drawer if it isn't already open. Copy the tenant URL and application secret for Kantega SSO Enterprise into Microsoft Entra, as shown in the below screenshot.
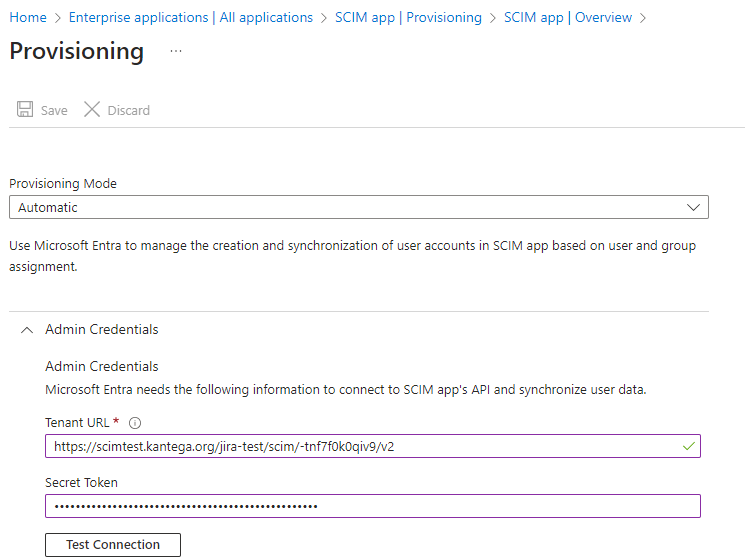
After filling in the required fields, click the Test Connection button. If everything is working, you should get a notification, and the Save button should become available.

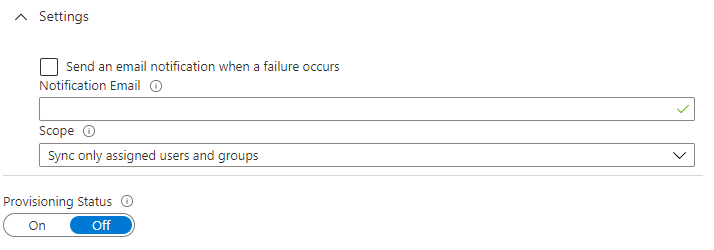
Set the provisioning scope
Configure attribute mappings
Mappings control the user account attributes that flow from Mirosoft Entra to Kantega SSO Enterprise. Under Provisioning settings, expand the Mappings drawer, then click
Some mappings needs to be changed and some mappings are unused and can be deleted.
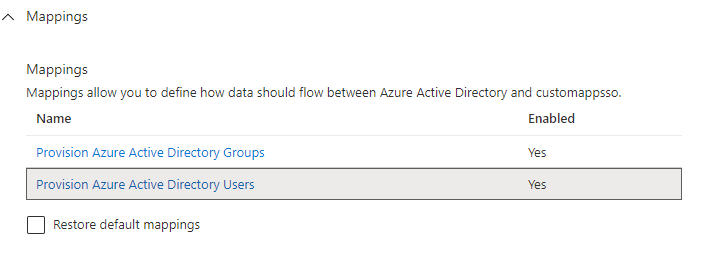
You should now see a list of default attribute mappings. Leave the following as they are by default:
userPrincipalName
active
givenName
surname
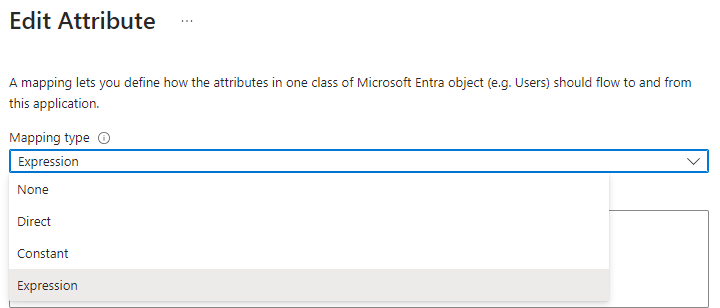
Change the Mapping type for the following mappings emails[type eq "work"].value, displayName and name.formatted from Direct to Expression, using the expressions from the table found below. Click a row to edit, modify according to the table, then save. The need for this change is since Atlassian accounts require a non-empty username, name, and email address, so you will need to provide a mapping that assures values for all of these, or provisioning of certain users may consistently fail.
SCIM attribute | New Attribute | Comment |
|---|
emails[type eq "work"].value | Switch(IsPresent([mail]), , "True", [mail], "False", [userPrincipalName]) |
| This expression will use userPrincipalName instead of mail for users that don't have [mail]. You can leave this on default if all your users have an Outlook license. You may use a different fallback source than userPrincipalName, too, but you must supply a non-empty value, or provisioning will consistently fail for affected accounts. |
displayName | Switch(IsPresent([displayName]), , "True", [displayName], "False", Join(" ", [givenName], [surname])) |
| Similar to the case with email, some types of users don't have givenName or surname. This expression prefers displayName when present. |
name.formatted | Switch(IsPresent([displayName]), , "True", [displayName], "False", Join(" ", [givenName], [surname])) |
| name of the user |
Delete the remaining attributes, then click save. Kantega SSO Enterprise currently won't use them. You should end up with something like these 7 attributes:

7. Enable provisioning and save
Return to Provisioning settings. Enable Provisioning, then click save. For resync and non-immediate changes, Azure AD works on a 40-minute timer, so any changes or error corrections you need to test can require considerable waiting.
Assign users and groups
Go to Users and groups and assign the users and groups that should be able to use the application and need provisioning. Note that the set of users being provisioned can be further limited/filtered in provisioning settings.
For further details on how to map attributes, please refer to Microsoft’s documentation on this: https://docs.microsoft.com/en-us/azure/active-directory/app-provisioning/functions-for-customizing-application-data.
Notes
You may reset/reprovision the SCIM directory in its entirety from the Entra ID Provisioning settings. There is no way to reprovision specific groups or users only as far as we know.
Entra ID SCIM works on a 40-minute timer. While assignment changes can be instant once you have a stable sync state, any changes that require a resync or re-init, for example, a manually forced resync or mapping change, won’t happen immediately. You will need to wait for the next sync pass, i.e., up to 40 minutes from when the change is made.


